Any Kitchen Will Do

Give me a kitchen and I will cook.

Archive for the category “Mom’s Kitchen”

Baked Tilapia

bakedparmesantilapiaIf you scroll through my recipes you will notice there are not many including fish. Not because I dislike fish, for I really like it, especially salmon and tuna. I think it is because I consider it more delicate and not as filling as other proteins, like beef, pork and chicken. When I think about stocking the refrigerator with a few days worth of leftovers I don’t lean towards fish.

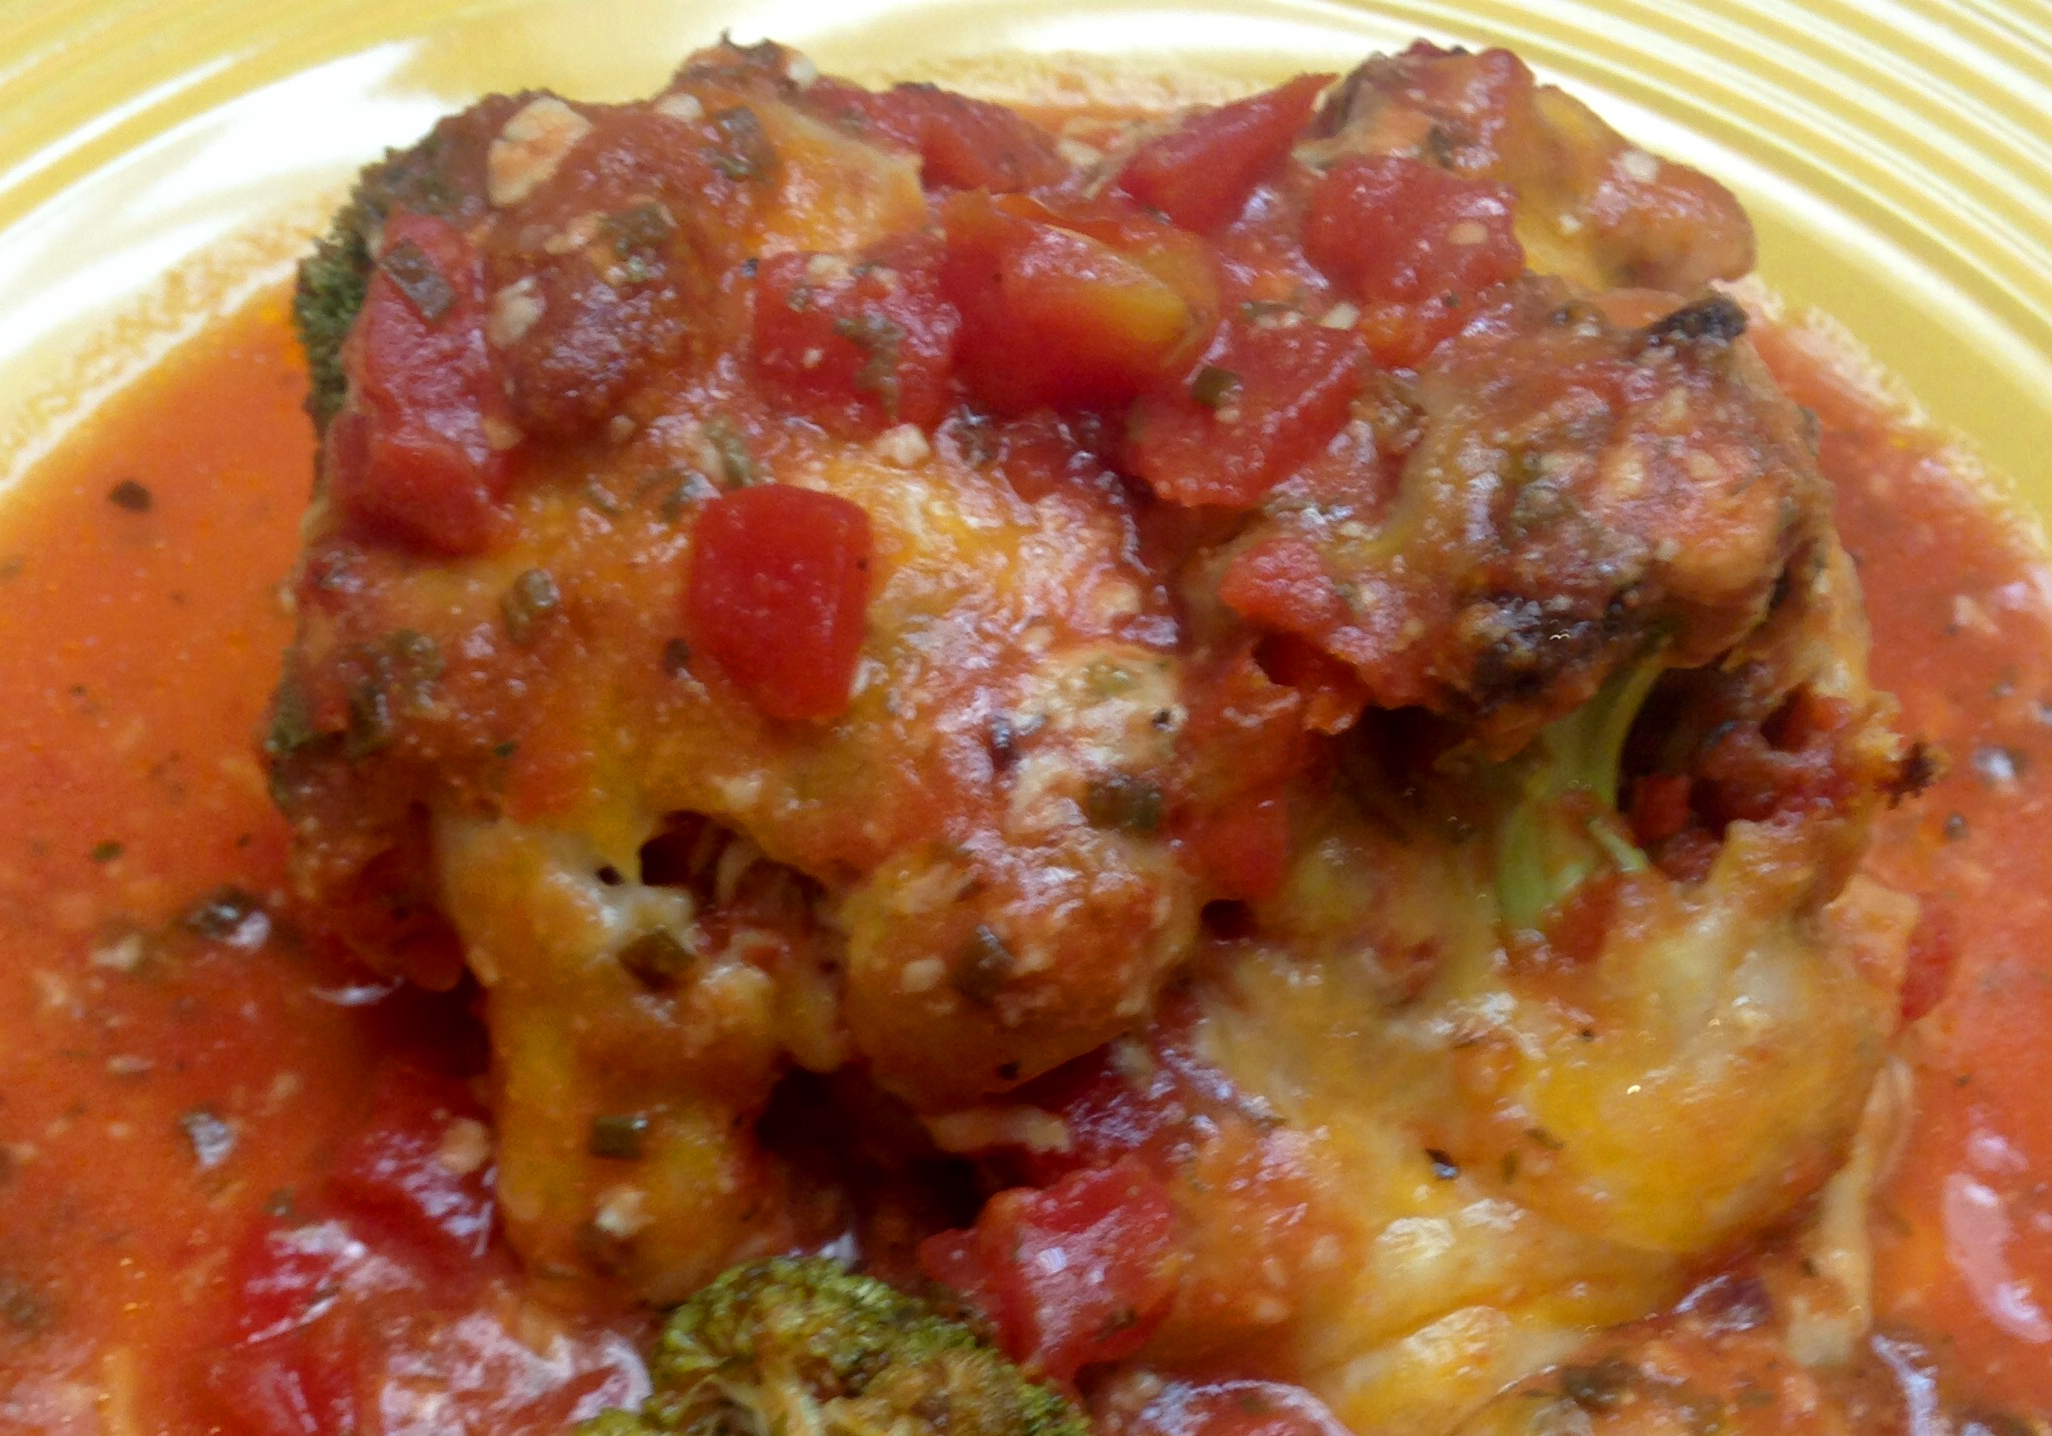
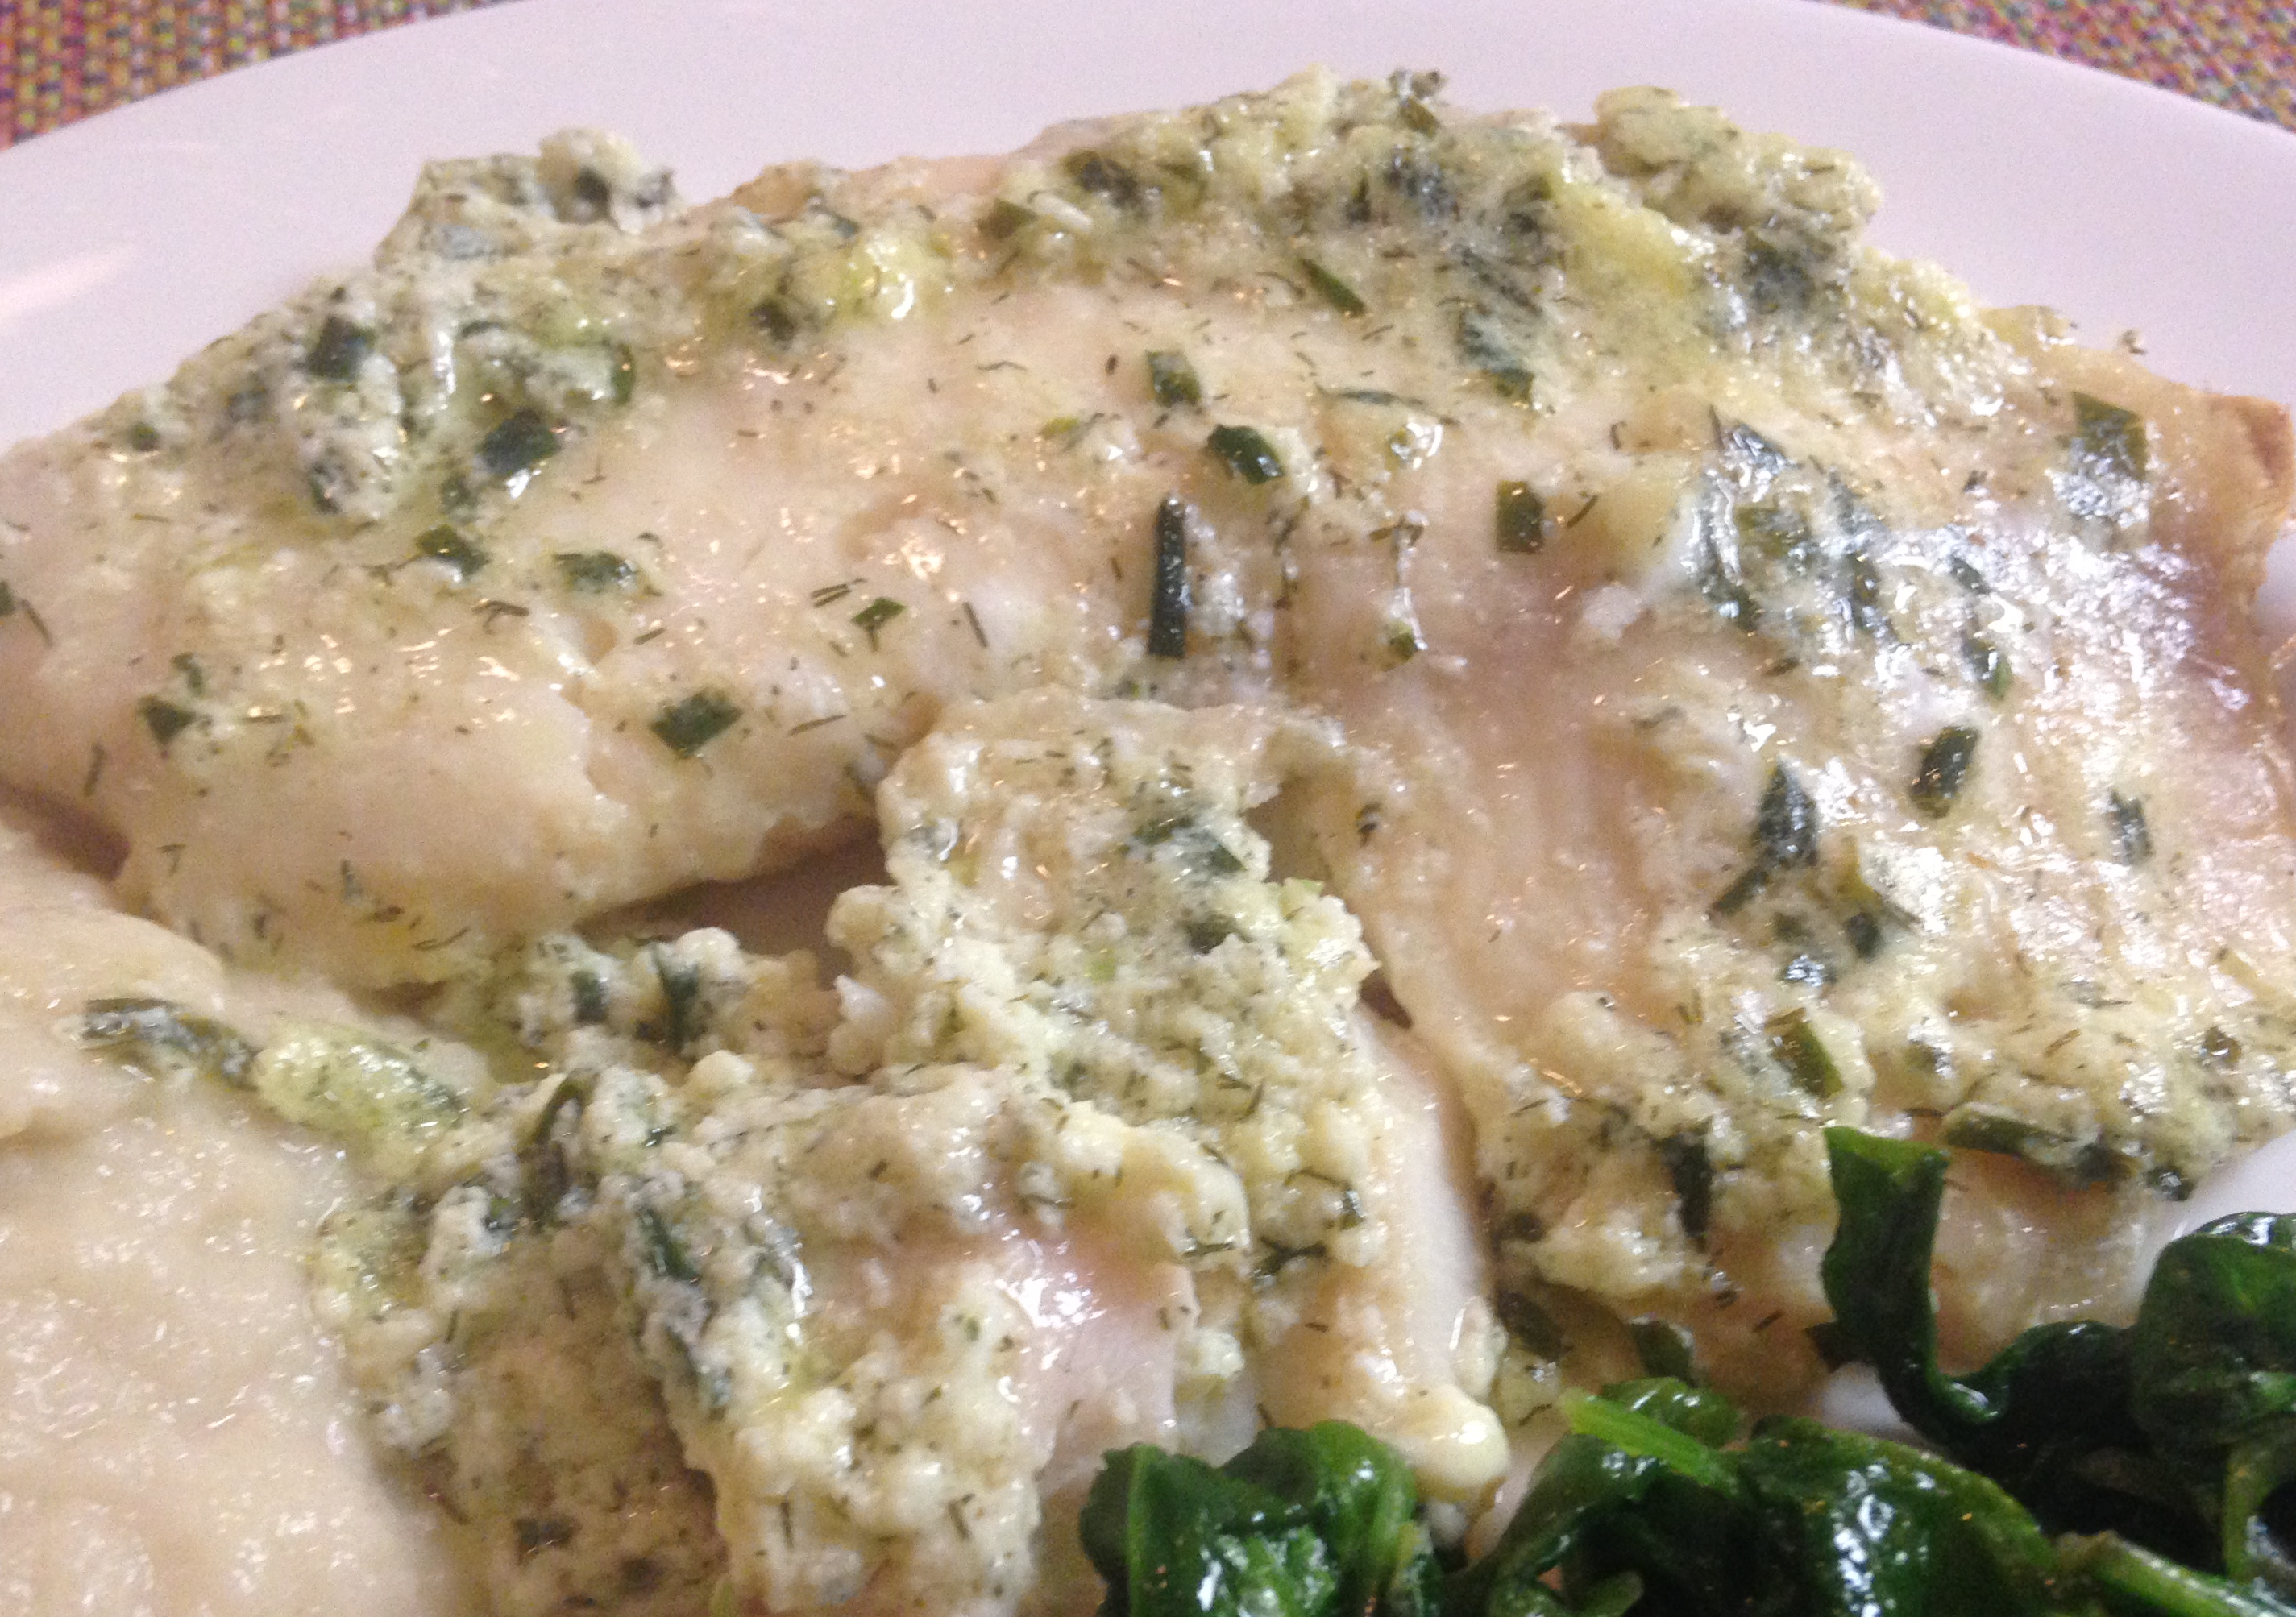
That said, this recipe for tilapia was absolutely delicious! The creamy sauce with egg and cheese protected the fish, allowing it to get cooked sufficiently without drying out. It was flavorful but not so strongly seasoned that it overpowered the fish. Surrounded by mashed cauliflower and sautéed baby spinach, it made for a lovely dinner. And the leftovers were good too!

Baked Parmesan Tilapia

1 garlic clove, minced
1/2 cup chopped fresh chives
1 teaspoon dill leaves
1/2 cup butter
1/4 cup lemon juice 
1/4 cup heavy whipping cream
1/2 teaspoon sea salt
2 eggs, beaten
8 tilapia fillets, deboned
1/2 cup finely grated Parmesan cheese

Preheat oven to 375 degrees.

In a medium skillet over medium heat melt the butter. When it begins to bubble add the garlic and chives. 
Sauté until garlic begins to brown. Remove from heat. 

Add lemon juice and stir. Add cream and stir until incorporated. By this time the sauce should be cool 
enough to not cook the eggs. Add the  salt and eggs, whisking until combined.

In a 9x13 inch baking dish pour a thin layer of sauce in the bottom, no more that a fourth of the sauce.

Arrange the fish in the dish. If the fillets need to overlap, do so with the thin ends. Pour the rest of the sauce 
on top, gently lifting pieces of fillet that overlap, letting sauce spread.

Sprinkle Parmesan cheese on top. Bake fish for 15 minutes until fish is flaking. 

Remove from oven and serve immediately.


Pecan Green Beans

pecangreenbeans

One of my favorite low carbohydrate vegetable dishes is green beans. I especially love them with crunchy bits of nuts in them and a pleasant coating of butter.

Whenever I make these I am reminded of the green beans my grandmother used to make. She started with fresh green beans and a little fat like I do, but her cooking approach was very different. She would boil those suckers all afternoon until they were mush at dinner time. They tasted great, but there was no need for teeth to eat them! The great thing about them was flavors from the pork belly she used for the fat element. The pork flavor permeated the beans, so every bite was delicious!

I don’t make mine the same way, partially because I don’t have all day to monitor the bubbling pot, but also because I like my cooked green beans with a little snap to them. The cooking time in this recipe softens the beans a bit, but they can still hold their own as individual, non-mushy beans, and you will need teeth to eat them.

Pecan Green Beans

1/4 cup bacon grease or butter
8 cups trimmed, bite-sized fresh green beans
1 1/2 cups roughly chopped pecans
1 teaspoon garlic powder
1 teaspoon onion powder
Sea salt and ground black pepper to taste

In a large skillet over medium-high heat melt the grease or butter. Add the pecans and let cook for about three minutes.

Add the green beans, garlic powder and onion powder. Toss until beans are coated and nuts distributed among them.

Lower heat to medium, cover and let cook for about five minutes, until beans begin to soften. Toss beans and cover again, cooking for five more minutes.

Season with salt and pepper, toss beans. Beans can be served immediately or cooked longer to make them the desired softness.


Chocolate Chia Strawberries

chocolatechiastrawberriesIt is a rare person who dislikes the combination of strawberries and chocolate. Since summer calls for fresh, light desserts I wanted to come up with a healthy version of chocolate strawberries that would be easy to eat.

I knew that my chocolate chia pudding was very chocolaty and good for us, so I figured stuffing it into berries would only make it better. They were a hit, and they made me wonder what else could be filled with chocolate….hmm….

Chocolate Chia Strawberries

2 dozen large strawberries, cored
1 1/2 cups coconut milk
4 tablespoons chia seeds
1 teaspoon ground cinnamon
4 tablespoons cocoa powder
1/2 teaspoon pure stevia powder

In a blender (or a medium bowl with stick blender) combine the milk, chia seeds, cinnamon, cocoa powder and stevia.

Chill filling for about 30 minutes until it firms up.

Using a small spoon fill the strawberries, shape the top of the chocolate into a mound on top of each berry and arrange on a serving platter.

Chill until time to serve or store refrigerated in an airtight container.

Chive Goat Cheese Dip

chivegoatcheesedipI love cheese. Occasionally I get a craving for a particular kind and have to do something about it. This time it was goat cheese. A couple of days after the craving began I was sitting on the porch enjoying the morning breeze. Near me was a big pot of tall, bright green chives. With guests coming over for dinner there was a need to have an appetizer, so this dip was born!

Previous goat cheese cravings resulted in appetizers like these cucumber bites, also these stuffed sweet peppers or this mushroom goat cheese soup, or cheese balls, which I often make during the holidays. My favorite use of goat cheese is in these stuffed flank steaks.

The combination of the goat cheese, sour cream and mayonnaise made for a very creamy dip base, and the chives, garlic and onion bits added complimentary flavors that traveled well as part of crudités!

Chive Goat Cheese Dip

1 cup goat cheese
1 cup sour cream
1/2 cup mayonnaise
1 tablespoon lemon juice
1 handful fresh chives (about 1 cup chopped)
1/4 cup finely chopped white onion
2 cloves finely chopped garlic
1 teaspoon sea salt

In a medium bowl combine goat cheese, sour cream and mayonnaise. Whisk until smooth.

Add lemon juice, chives, onion, garlic and salt. Whisk more until everything is combined.

Chill for at least an hour before serving.

Curry Burger Cups

curryburgercupsI went a bit retro on this one – my mom gave us her electric skillet. For decades it has been used to make meals on the counter top. From pancakes to fried chicken we were well fed by the skillet (and mom, of course!). Since it was my mom’s it has of course been well cared for and is in excellent condition. I aspire to care for it as well, especially since I plan on using it a lot.

Compared to a stove top skillet, the electric skillet has a larger cooking surface and there is a bit more control over the temperature. I usually rely on iron skillets on the stove and forgot how fun the non-stick electric versions are! The big, domed top even has a vent to control moisture release. I may be a kitchen nerd, but it is so fun using it!

As for the lovely meal I made, using peanut butter in a burger might sound odd, but combined with the yellow curry spices the flavors were wonderful. Since the burgers aren’t flipped the bottom gets a good sear, which of course always goes well with cheddar cheese. Making the bowl in the burger helps retain the cheese instead of it dripping off the edges of a rounded burger top. Don’t get me wrong, I like the crispy cheese left in the pan when it dribbles off the edges of a cheeseburger, but I also like cheesy burgers that don’t lose any cheese while it melts.

Bites of the burgers with the peppery mix of raw baby kale, mustard greens, spinach and chard really made for a wonderful mouthful.

Curry Burger Cups

2 pounds ground beef
2 large eggs
1/2 cup Worcestershire sauce
1/2 cup creamy peanut butter
2 tablespoons dried parsley leaves
2 tablespoons ground turmeric
1 teaspoon ground cumin
1/2 teaspoon ground cinnamon
1/2 teaspoon ground black pepper
1 teaspoon paprika
2 teaspoons sea salt
2 teaspoons garlic powder
2 teaspoons onion powder
2 cups grated sharp cheddar cheese

In a large bowl place all the ingredients except the cheese. With a strong mixer or your hands thoroughly combine the ingredients. Form six patties, creating a bowl in the middle of each, leaving approximately 1/2 inch rim on the edges.

In a large skillet over medium heat (or electric skillet at 325 degrees) place the patties. Fill the bowl of each patty with 1/3 cup cheese. Cover and let cook for about ten minutes, until beef is cooked to desired doneness (medium is 160 degrees).

Serve immediately on top of raw greens or with a cooked side of vegetables.

Tomato Broccoli Chicken

italianchickenThe other day I was craving lasagna. In the past I have made it grain free by substituting zucchini or cabbage for the noodle layers. I wanted the same flavors a little easier and faster than prepping and constructing a casserole. The cheese and tomato sauce and chicken really hit the spot. The leftovers were even better!

Tomato Broccoli Chicken

8 chicken thighs, bone in (skin optional)
2 cups tomato sauce
4 cups diced tomatoes with juices
2 tablespoons dried parsley
1 tablespoon dried basil leaves
2 teaspoons dried oregano leaves
2 garlic cloves, finely minced
1/4 cup finely minced white onion
1 teaspoon sea salt
4 cups broccoli florets
1/2 cup finely grated Parmesan cheese
2 cups grated colby jack cheese
Sea salt and and ground black pepper to taste

In a medium pot over medium heat combine the tomato sauce, diced tomatoes, parsley, basil, oregano, garlic and salt. When sauce begins to boil turn temperature down to low. Cover and let simmer for 15 minutes, then remove from heat.

Preheat oven to 350 degrees.

In a 9×13 inch baking dish pour a thin layer of sauce. Generously salt and pepper all sides of the chicken and place, skin side up, in the pan. Arrange the broccoli florets in between the chicken thighs. Sprinkle the Parmesan cheese on top of the chicken and broccoli.

Pour the rest of the sauce over the chicken and broccoli, leaving some room at the top of the pan for cheese and bubbling. Sprinkle the colby jack cheese evenly on top of the sauce. Place on middle rack of the oven and bake for 45 minutes, until chicken is cooked through (at least 165 degrees).

Remove from oven, let rest for ten minutes before serving.


Chicken Piccata

chickenpiccata

It has been so long since I had chicken piccata I just had to whip some up. I don’t typically work with chicken breasts, because I am a dark meat kind of girl. For the right sauce I will go so far as to work with the white meat, as is the case with piccata. I love the combination of lemon and butter in a sauce.

Only once in my life was the butter and lemon combination offensive, and it was my fault. It was an early chicken cooking experience and it was for a dinner date. I decided to do an aggressive marinade for some chicken breasts. I marinated the chicken overnight in a can of lemonade concentrate. What I wanted to do was make sure the lemon flavor was throughout the chicken. What actually happened was the concentrate practically cooked the chicken. I sautéed the chicken in butter and proudly served it to my guy, without first tasting it. After tasting it myself I realized he was being very kind when he said it was good. I, on the other hand, spit mine out. Lemon flavor overload! That day I learned to respect the lemon.

I applied my lemon respect to this dish. The sauce was filled with lemony goodness, but not too much! The traditional piccata recipe includes wheat flour, which I avoided in this version. I did not take the traditional step of dredging the chicken in wheat flour or use it to thicken the sauce. I left the chicken uncoated and chose not to use an alternative thickener, but instead decided to keep it simple and just add some cream. Worked out great!

A very common ingredient in chicken piccata is capers. I put them as optional because I did not include them in making this version. I like them, but Little B is not a fan, so they were left on the shelf….

Chicken Piccata

6 chicken breasts, boneless and skinless
6 tablespoons butter
1/2 large onion or 2 medium shallots, finely diced
4 garlic cloves, diced
1/2 cup dry white wine
2 large lemons, juiced
1/2 bunch parsley, finely chopped
Sea salt and ground black pepper to taste
1 cup heavy whipping cream
2 tablespoons capers, drained (optional)

Butterfly chicken breasts (cutting in half lengthwise), cutting all the way through instead of leaving the two halves intact. Season all sides with salt and pepper.

In two frying pans over medium high heat melt two tablespoons butter in each. Place six chicken breast halves in each skillet. Sear chicken, about three minutes each side. The chicken does not have to be cooked through. Place seared chicken in 9×13 inch baking dish.

Preheat oven to 300 degrees.

Combine cooking juices and scrapings from bottom into one skillet over medium heat. Add the garlic and onion. Sauté until garlic and onion begins to brown. Add white wine, scraping the bottom of the pan to loosen drippings, and cook until steam rises. Allow sauce to reduce for about five minutes.

Add lemon juice and parsley, stirring and cooking for another three minutes. Add the cream and the last two tablespoons of butter, stirring until butter is melted and sauce begins to bubble. Add salt to taste, if needed then remove from heat.

Pour sauce over chicken. Cover dish with foil and place in oven. Bake for 30 minutes, until chicken is cooked through and sauce is bubbling.

Serve immediately over steamed vegetables or spaghetti squash, generously drizzling sauce over the chicken.


Golden Lemonade

turmericlemonade5

As the weather gets warmer I get less and less excited about warm beverages. This is an issue because of how we get turmeric into our systems. We typically do a combination of capsules and a concoction we call slime – a combination of butter/coconut oil, cayenne pepper and turmeric – either in our coffee or hot tea. I don’t do well drinking hot beverages in hot weather, so I had to come up with another method of getting turmeric in me.

Turmeric is a most awesome anti-inflammatory. It has been shown to reduce inflammation in the body, boost activity in the immune system, fight against the development of cancerous cells and make you more resistant to neurodegenerative disorders. The best way to maximize absorption of turmeric (up to 2000%) is to take it with pepper and a bit of fat, which is why we take turmeric capsules that include pepper and some fish oil as fat.

After doing a bit of research I came up with this yummy lemonade. It does not include any fat, but with the dash of pepper it helps maximize the turmeric benefits. In addition to the health benefits it is quite a pretty drink. It is a bit more savory than plain old lemon lemonade, but it is a pleasant, refreshing change.

Golden Lemonade

6 cups water
2 large lemons
1 tablespoon turmeric powder
1/4 teaspoon ground black pepper
3/8 teaspoon pure stevia powder (equivalent to 1/4 cup pure cane sugar)

In a large pitcher add the water. Juice both lemons and and add juice with meat to water. Add turmeric and stevia. Whisk together all ingredients until stevia and turmeric are combined.

Chill for at least one hour and stir before serving. Drink lemonade over ice, either straight, or dilute 1:1 with flat or carbonated water.

Cold Green Bean Salad

coldgreenbeansaladAs I have mentioned many times before, we make sure there are prepared foods stocked in our refrigerator, since there are scarce convenience foods that fit our sugar free, grain free eating habits. We prepare boiled eggs, bite-sized raw vegetables, cured meats and salads of all kinds. Making salads out of staples is an easy way to keep the fridge full, like Dilly Egg Salad, Tuna Salad Saute, Don’t Have To Choose Salad, Antipasto Salad or my recently shared Cucumber Salad.

Due to the freakishly mild winter in our current climes there are already fresh green beans available, so I grabbed some and brought them together with some other ingredients for a marinated salad. The thing I like most about marinated salads is that they get better every day they sit. On day four after making this salad the acids in the dressing may have made the green beans a little less bright, but the beans also soaked up all the flavors, including the tang of the red onion, and a serving of it tastes heavenly.

I encourage you to experiment with other salad fixings too! I’ve made similar salads using slender asparagus instead of green beans, Greek olives instead of black, mushrooms along with tomatoes, and even thrown in some chopped up ham or salami. Noticing a variation on a theme? The thing I have learned making cold salads over the years is that two cups of dressing seems to be just right to coat 9-10 cups of salad, which is the case here.

Have fun in your kitchen and enjoy the bright, healthy produce of spring!

Cold Green Bean Salad

2 pounds fresh green beans
2 cups grape or small cherry tomatoes
1/4 large red onion
2 cups large black olives, drained
2 cups vinaigrette dressing (I suggest my Herby Dressing or Greek Dressing)
Sea salt and ground black pepper to taste
2 teaspoons dried red pepper flakes (optional)

Make your vinaigrette dressing of choice, if not already made or using store bought. Set aside.

Remove ends from green beans and slice them into bite sized pieces, about one inch. In a medium pot with steamer insert bring one inch of salty water to a boil. Add beans to steamer and lightly steam about five minutes, with the intention to soften them but retain their bright green color. Remove beans from pot, set them aside to cool and prepare remaining ingredients.

Slice tomatoes in half lengthwise and place in bowl. Finely chop red onion and place in bowl. Slice black olives in half horizontally and place in bowl. Add green beans. If including red pepper flakes add them now.

Pour dressing over salad ingredients. Gently toss salad until well coated. Cover bowl and chill for at least four hours or overnight.

Remove from refrigerator and toss salad again, then taste and add salt and pepper to enhance dressing flavor (need will vary depending on dressing used). Toss one more time to incorporate salt and pepper, then serve.

Susan’s Stuffed Chicken Breasts

susansstuffedchickenbreastsWhenever my friends have news, good or bad, I want to cook for them. For good news it is a celebration! For bad news, it is my version of giving comfort. It is born from a habit started long ago when my family. We always celebrated or mourned surrounded by our people over a table full of food. One of my oldest and dearest friends Susan came over with news recently and cooking was definitely a necessity.

She loved it when I made rolled chicken before, so I followed their fowl lead and came up with another rolled beauty. These chicken breasts came out much less dainty and heartily filled us up. Definitely appropriate for the occasion, since Susan has some ass kicking to do in the near future.

As the holiday season draws near there is a lot of feasting and fasting and celebrating. Embrace the time you have with family and friends. Embrace the time hanging out in the kitchen. Embrace the kids playing chase in the house (and the resulting broken vase). Embrace the chill while sipping coffee in the morning. Embrace the hectic days and the slow, lazy days. Embrace each other and yourself. Time passes swiftly so embrace what you have in real time. Embrace. Embrace stuffed chicken breasts because they are most awesome.

Susan’s Stuffed Chicken Breasts

2 14.5-ounce cans diced tomatoes
1 8-ounce can tomato paste
3 garlic cloves, chopped
1 small bunch fresh parsley, stems removed
3 sprigs fresh oregano, stems removed
8-10 fresh basil leaves
1 tsp ground cumin
1/2 tsp ground black pepper
1 tsp sea salt
4 cups fresh spinach
2 cups (or 2 14-ounce cans) marinated artichoke hearts, drained
1/2 medium yellow onion, finely diced
1 Tbsp lemon juice
6 boneless skinless chicken breasts
12 slices thin deli ham
4 cups grated cheddar cheese
Salt and pepper to taste

In a medium sauce pot over medium heat add the diced tomatoes, tomato sauce and garlic. Roughly chop the parskley, oregano and basil leaves. Add all the herbs except about 2 tablespoons to the sauce. Set aside the extra herbs for the top of the dish. When the sauce begins to steam, lower heat let simmer for about 30 minutes then remove from heat.

While sauce is simmering prepare the chicken and stuffing. Finely chop the spinach and artichoke hearts. In a medium bowl combine the artichoke hearts, spinach, onion and lemon juice. Toss until combined. Add salt and pepper to taste. Set aside.

Spread a piece of wax or parchment paper on the counter, at least twice the size of a single chicken breast. Place a breast in the middle of the paper. Cover the breast with a second piece of paper. With the flat side of a tenderizer mallet (or a regular mallet covered in cling wrap), gently pound the breast, starting from the center and moving towards the edges, until it is 1/4 inch to 1/3 inch thick. Repeat with all the breasts, changing out the paper as needed. Generously season each breast on both sides with salt and pepper.

Preheat oven to 350 degrees.

To stuff the chicken clear a work surface. Position nearby a 9×13 inch baking dish. Spread a thin layer of tomato sauce on the bottom of the dish. Place a single breast in front of you on your work surface lengthwise. Use two pieces of ham to cover the surface of the breast as much as possible. Sprinkle 1/3 cup of grated cheese on top of the ham. Spoon 1/6 of the spinach artichoke mixture in a row from top to bottom on one side of the breast. Starting on the side nearest the mixture begin rolling the breast,  making sure the left and right ends overlap at least once at the end of the roll. Place the roll seam down in the baking dish. Repeat with the remaining breasts.

Pour tomato sauce over chicken rolls, leaving 1/4 inch from the top clear of sauce so there is room for it to bubble up to the dish edges. You may have leftover sauce, depending on the size of the chicken breasts. Sprinkle remaining grated cheese and chopped herbs on top of the sauce. Bake for 45 minutes until chicken is thoroughly cooked. Remove from oven and let sit for ten minutes before serving.


Post Navigation