Any Kitchen Will Do

Give me a kitchen and I will cook.

Archive for the month “June, 2014”

Jalapeno Poppers

stuffed jalapenos_edited-1

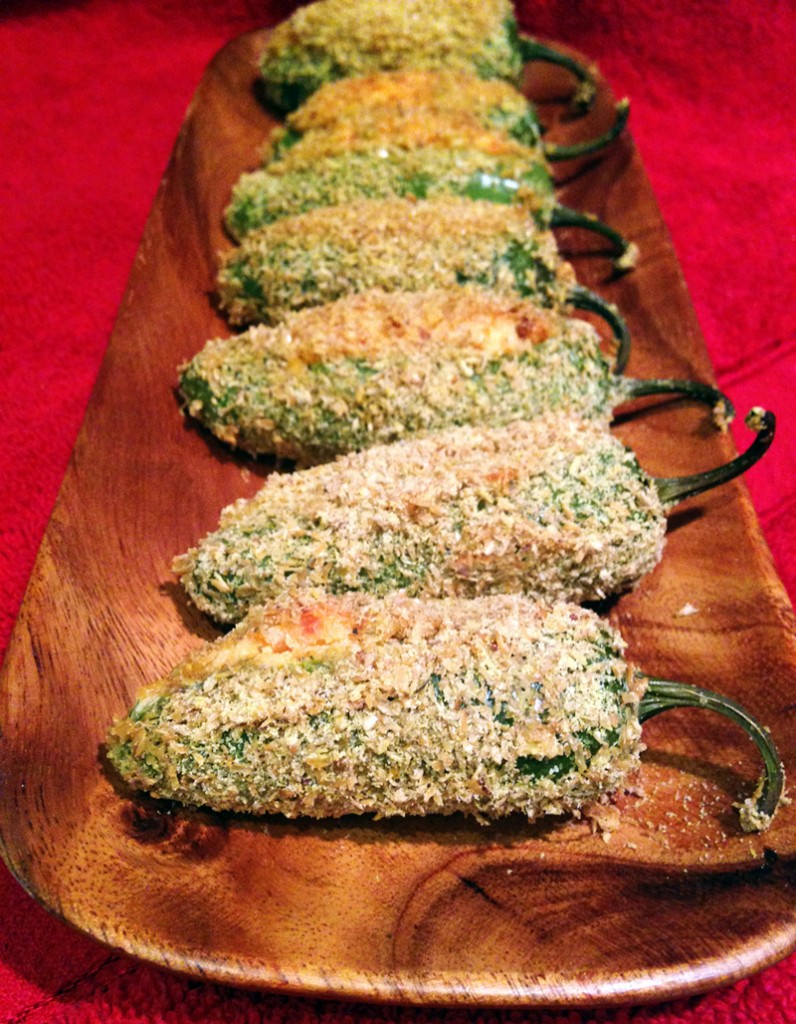
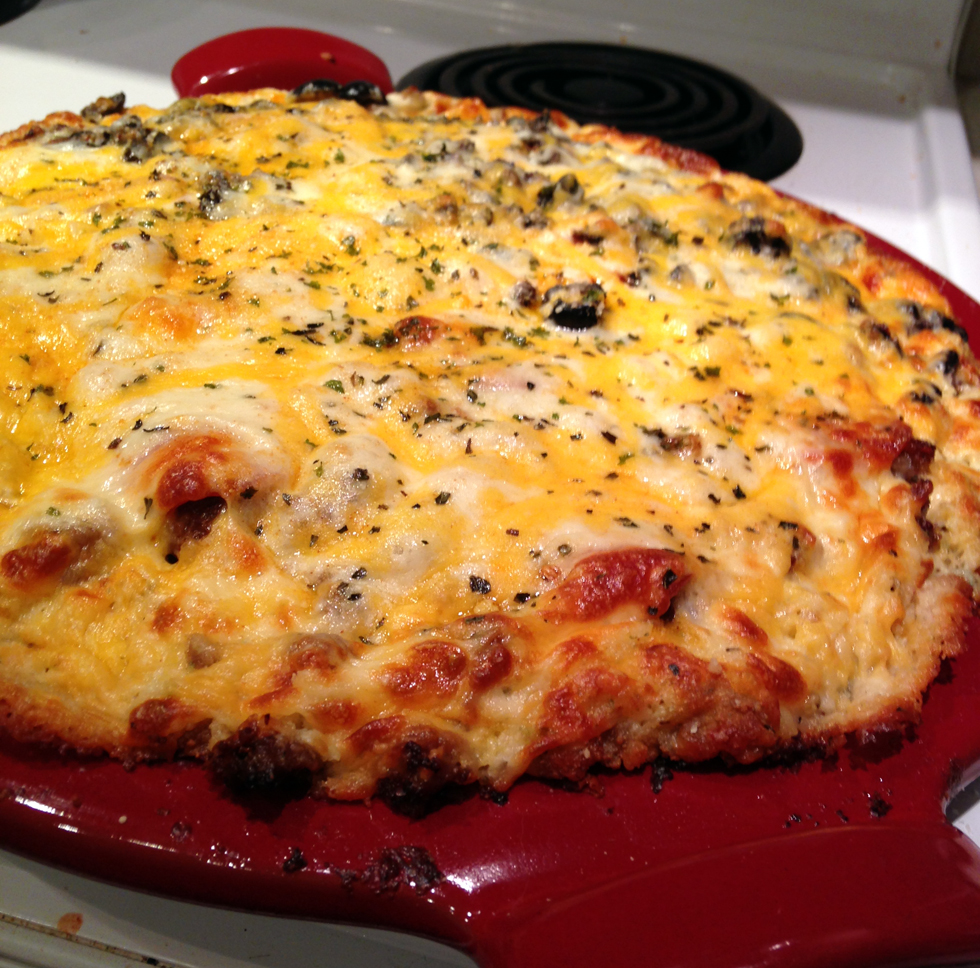
During the first year of my blog I made some addictive jalapeno popper dip. It had the stuffed jalapeno taste and we spread it bumpily on almost everything until the last spoonful was gone. After finding jalapenos on sale at the store the other day I decided it was time to again delve into the jalapeno popper world, with the intent of creating a more original result. We have experimented with finding a coating that bakes up crisp during our foray into making Scotch Eggs. Confident in our knowledge  from many egg batches, we applied the same idea to these poppers. Instead of making it easy on ourselves by cutting the peppers in half and stuffing them, we wanted them whole, but also breaded! Why keep it simple and wrap them in bacon? Hmmm….bacon. Not this time. Much too easy and predictable. We wanted to taste the peppers, which would be harder if the bacon was involved. It is a very domineering ingredient, although it goes with almost anything. Now I want some bacon…..but on to the bacon-less poppers! The filling stayed in the poppers and kept them filled, the breading stayed stuck, and boy did we taste the peppers! We expected a varying level of hot among the peppers, as is typical, but Big D got quite a surprise. He must have bit into a seed cluster juuuuust right, for he went running for a drink, then dove for a piece of bread, where he finally found relief. It is rare when he gets over heated by spice, much less have tears well in his eyes because of them. I had no such biting surprise, but really enjoyed noshing on the poppers and relished their return to our growing list of things-we-gave-up-and-missed-but-now-have-back-again. Yay!

Jalapeno Poppers

8 – 10 medium/large jalapenos (as straight as you can find)
8 ounces cream cheese
1/2 cup cheddar cheese, grated
2 egg whites
1 cup golden flaxseed meal
1 tsp garlic powder
1 tsp ground cumin
1 tsp salt
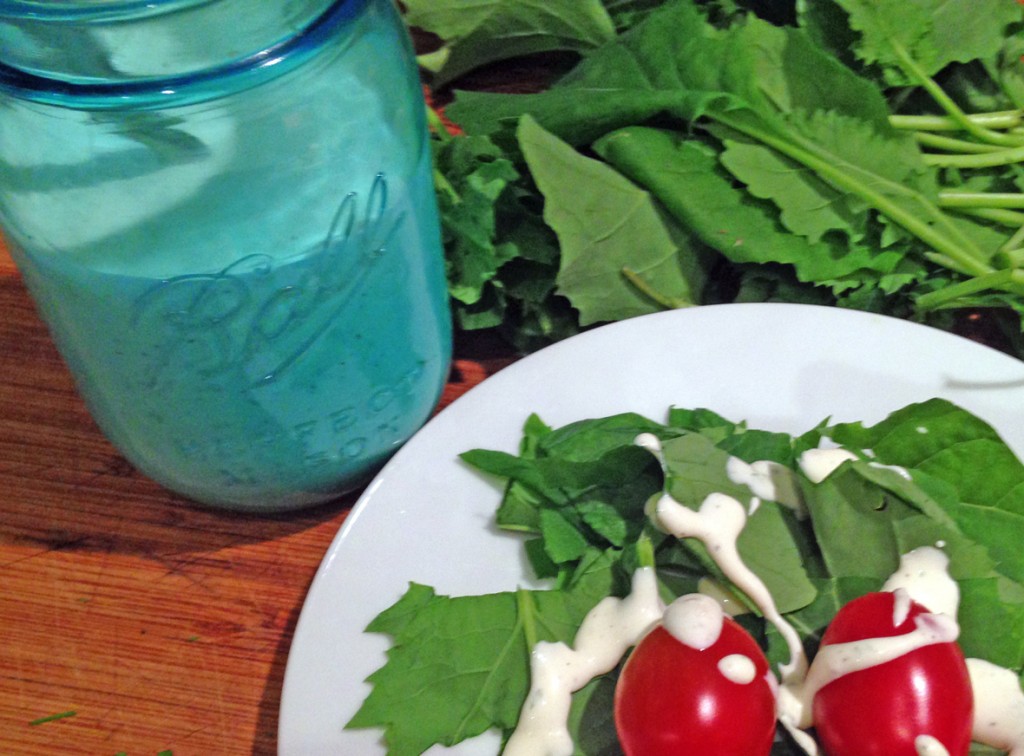
Ranch Dressing (optional)

Preheat oven to 350 degrees. Lay jalapenos on a flat surface and figure out which side they rest on most stably. On the side opposite of the resting side cut a narrow opening that stops short of both ends lengthwise – narrow enough to keep the stuffing in, but wide enough to clean out the seeds and pulp from inside the pepper. Leave the stem attached. With a small spoon or narrow knife gently scrape out some seeds and pulp, making room for the stuffing. Set aside the jalapenos. In a medium bowl place the cream cheese and cheddar cheese. Heat in microwave on 50% power for one minute, until softened. Add 1/2 tsp garlic powder, 1/2 tsp cumin and 1/2 tsp sea salt and stir until ingredients are combined. Using a small spoon gently push cheese mixture into the jalapenos until they are full, or the filling is used up. Place the egg whites in a medium bowl and whisk until slightly foamy. In another bowl combine the flaxseed meal, 1/2 tsp garlic powder, 1/2 tsp cumin and 1/2 tsp salt. Dip each stuffed jalapeno in egg whites, then roll in flaxseed mixture until well coated, pressing some of the meal against the pepper where it does not instantly cling. Gently place coated jalapenosin a small baking dish, with a little space between. Bake for about 50 minutes, until coating browns and peppers are soft. Remove and let cool for five minutes. Serve with ranch dressing or other dipping sauce.

Ranch Dressing

ranch dressing

Summer means salad, especially a salad with nice, tender, young collard green leaves that you see above. They have a nice peppery taste that is less bitter than older collard greens. These particular greens came straight from our little container garden on our balcony, which made them taste even better! It also means raw veggies straight from the fridge as side dishes. Most vegetables better for you raw, and they also contribute to reducing the heat in the kitchen on a warm June day, even in Alaska. Since making our own stellar homemade mayonnaise we are confidently surging forward in using it for sauce bases, which includes this lovely dressing. I have always preferred homemade ranch dressing over the bottled stuff, and have usually relied on dressing mixes. When I started reading labels more closely I discovered some mixes have untoward ingredients, like monosodium glutamate. That stuff puffs me up like a balloon. Others have ‘modified food starch’. If you look up such an ingredient you may find it can sometimes include wheat. Not fun, especially for Big D. There goes the mix permanently off the grocery list. Geez…. Of course, if other people can make homemade versions, then why can’t I? We certainly have a spice cabinet stocked sufficiently to do so. I feel silly not having tried it before. Now I feel happy having it continuously available in my fridge, whether it is summer or not. You will see it here often!

Ranch Dressing 

1 cup mayonnaise
1/2 cup heavy cream
2 Tbsp lemon juice
1 1/2 tsp apple cider vinegar
1 Tbsp dried onion flakes
2 Tbsp fresh parsley, finely chopped
1 tsp dried basil leaves, crushed
1/2 tsp black pepper, ground
1/2 tsp garlic powder
2-4 Tbsp water (optional)
1/4 – 1/2 tsp sea salt, to taste

In a medium bowl combine all ingredients except salt, whisk together until well combined. Add some water if dressing is too thick. Add salt to taste. Chill overnight to allow flavors to blend. Store in the refrigerator.

Mayonnaise

mayoFor a long time I did not try making mayonnaise. Since I was a kid I always liked the taste of it, and the smooth creaminess it gives to sandwiches, sauces and recipes. I fondly remember lunching on many ham and cheese sandwiches layered with tomatoes, pickles and a nice combination of mayo and mustard mixed up with it all. The sandwiches, along with the occasional dollop on a tomato or tossing it in tuna salad brings back memories of hot summer days, and loud lunches in school cafeterias. Just to clarify, I am particular about my mayonnaise. Don’t even try to assume some generic brand or that despicable ‘sandwich spread’ is okay. Give me Kraft or Hellmann’s traditional versions and I am set. That sweet, cloying ‘spread’ is for putting on white bread and other horrid foods. Keep it far away from me. I like my mayonnaise tart and creamy. A few years ago Big D and I started trying to get away from mysterious chemicals, and have gradually moved away from store brands where we could. A lot of our successes have kept us out of the middle aisles of the grocery store; you know, where the processed foods and packaged convenience foods are often found. We still dip into the aisles for stuff, but our kitchen is much more absent of such items, compared to a year ago. We feel happier and healthier for it, especially showing Little B how to rely on whole foods and making what you want from scratch. The first forays into making mayonnaise were good tasting, but not quite a replacement for the flavor of my youth. You might not be as picky about the taste as I am, but Big D tried this version recently and it hit the mark! We are pretty sure it is the avocado oil that took it over the edge as a true substitute for me. Olive oil works well, too, but the flavor of olive oil takes it in a different direction. So excited to have such an easy recipe that works every time and keeps me away from the store stuff, which is soy-filled, sugar-filled and preserved with calcium disodium EDTA. I will take care of my own preservation, thank you.

Mayonnaise

1 egg yolk
1 egg
1 cup avocado oil
2 Tbsp lemon juice
1/4 – 1/2 tsp sea salt

Place egg yolk and egg in a blender, turning it on medium speed. Slowly add oil in a narrow stream to the eggs until fully incorporated. Add lemon juice while the mixture continues to blend. Stir in salt to desired taste. Remove mayonnaise to a glass container that can be sealed air-tight. Store in refrigerator.

Beef and Cheese Enchiladas

lc beef enchiladasThis pan of melted cheese may not look like much, but it represents an exciting success for us. It is another one of those comfort foods we abandoned a while back when we focused on low carb eating. Except for those silly little carby tortillas needed to roll up an enchilada, the traditional ingredients are friendly to our diet. Now, I am sure you already think us crazy for following a restrictive diet. Remember when eggs were bad for you, then red wine were good for you, then maybe not, then….you get the idea. The pros and cons of all kinds of diets in American society fluctuates constantly, so I no longer worry too much about what other people think is ‘good’ or ‘bad’ for us. We feel good, are losing excess weight, and trying to be good examples for our daughter, who we hope can avoid the overweight challenges we currently face. To make us even more crazy we added to a new element to our eating habits. Big D addresses it here very well, so I won’t go into details about intermittent fasting. One side effect of the fasting is that we very much appreciate and value what we eat and look forward to our food-making sessions even more. Some of our sessions resulted in Big D figuring out tortillas recently. We almost immediately decided that a good use of them was experimenting with enchiladas, using the thinnest ones he made. This recipe was enough to fill us up and sate our longing for that South Texas comfort food. Served up with some guacamole and some roasted vegetables, they are so very very good, especially right before a fasting period. I still have not figured out a substitute for refried beans, but give me some time.

Beef and Cheese Enchiladas

4 large tortillas
2 cups taco meat or leftover shredded roast
4 cups shredded colby jack cheese
1 14.5 ounce can diced tomatoes and chiles, drained
Salt and pepper to taste

Preheat oven to 350 degrees. Lay out tortillas on a flat surface. Place 1/2 cup of taco meat and 1/2 cup of cheese on each. Sprinkle with salt and pepper. Make ready a deep, rectangular loaf pan. Roll a filled tortilla until the opposite edges overlap. Place it snugly in the pan. Repeat with the remaining tortillas and fit them closely in the pan, ensuring they don’t unravel when the pan is full. Spread tomatoes and chiles over the top of the enchiladas. Top with the remaining cheese. Bake for 35 – 45 minutes, until cheese is melted and edges are browning and crispy. Remove from oven and let sit for five minutes before serving.

Nutty Chocolate Protein Bars

nutty chocolate protein bars

For months Little B took ballet lessons on Saturdays. They are now over, including the flashy, chaotic shows. It was quite an ‘experience’, but is now over. I will reserve my opinion about the experience, but suspect she has more enthusiasm for other activities. I personally am looking forward to getting back to more weekend hikes.  We have standard food we take on hikes and overnight trips – nuts, peanut butter, jerky, cheese, boiled eggs. They are convenient, energy-building and filling, but with all the summer hiking in our future I wanted to add some variety. The idea for these bars sprung from here. The chewiness and nuttiness reminds me of a candy bar you find at the store – rhymes with tickers. After sufficient bar chilling occured Little B tentatively took a small first bite, then proceeded to eat an entire bar and asked for some in her lunch the next day. Score! This is significant, because in her worldly 4 3/4 year old brain anything mommy suggests is immediately suspect. These bars are a tiny bit sticky at room temperature, but what protein bars aren’t? They hold together well when wrapped in foil or plastic wrap, so score again! It is easy to add them to the hiking food mix, and quite a treat when taking a break looking over water and mountains and whales. Yep. The whales are pretty spectacular. And so is everything else. I am going to experiment with less sticky bars, but these easy-to-make snacks are great for dealing with hunger when you want to spend your time focusing on life and love and nature. Even ballet.

Nutty Chocolate Protein Bars

1 ounce bittersweet chocolate
2 tablespoons butter
2 tablespoons heavy cream
2 tablespoons Da Vinci sugar free syrup, any flavor
1 Tbsp Nutiva Stevita
1 cup whey protein powder, vanilla flavor
1 tsp ground cinnamon
1 1/2 cup mixed raw nuts, finely chopped
1/2 cup unsweetened coconut

Line an 8×8″ baking pan with nonstick foil. In a medium microwaveable bowl, melt the chocolate and butter on half power about 1 minute or until melting and softened. Stir until smooth and blended. Add in the cream, syrup, sweetener and protein powder.The mixture will be stiff and sticky when well blended. Stir in the nuts and coconut – you may need to use your hands to get it all mixed in, but then they would already be ready for putting it in the pan. Firmly press the mixture into the bottom of the foil lined pan using the back of a spoon that is lightly coated with oil or butter, or just use your hands. Chill at least two hours or until firm. Cut into eight large bars or 16 snack squares. Store in refrigerator or freeze.

Tortilla Fun

tortilla pile

I cannot believe how freakingly awesome these tortillas are! Freakingly! Not a spec of wheat or corn, but the taste and texture reminds me of some delicious, substantial homemade corn tortillas made at a little restaurant in San Antonio, Taqueria Aguascalientes. As with a few other recipes recently, we are discovering that some quick cooking in a microwave makes for some satisfying low carb substitutes for otherwise carby buns and desserts.  Many of our living situations have included a distinct absence of microwaves, so when we actually have one we tend to forget to use it. They are convenient, but the unbalanced heating they do is either a result of the technology, or from an absence of experience we have from rarely using them. When I was tortilla prepa kid there was an ever present microwave. I relied on it heavily to reheat leftovers after soccer or volleyball practice, and to concoct a comfort food, which I will not reveal now, but maybe in the future. We have officially rediscovered the ’80s cooking phenomenon. Now, back to the tortillas! Big D has made dozens of them. We have spent many an evening experimenting with different thicknesses and cooking times. They can be smaller and thicker, like a gordita tortilla, thin like a corn tortilla or big and thick like a wheat flour tortilla. They have returned to our menu things like breakfast tacos, tostadas and the ever popular fajita tacos. Now, the recipe says to spread a thin layer of batter on a plate with wet hands, I really mean a thin layer, like you can see the plate through it. For thicker ones you just need to see less of the plate. Notice what I mean by thin in the picture to the right. THIN!!! One last note – these guys keep well in the fridge, so make a big batch and eat them all week. Or do what I do and sit googly-eyed while your hubby makes a batch that you can eat on all week…

Tortilla Fun

4 cups almond flour
4 Tbsp coconut flour
½ cup golden flaxseed meal
1 ½ tsp sea salt
8 eggs
2 Tbsp coconut oil or lard
½ tsp stevia/erythritol powder
4 Tbsp apple cider vinegar
Butter for cooking plates

Place almond four, coconut flour, flaxseed meal, salt, baking soda and erythritol in a bowl and stir until well mixed. Add eggs, vinegar and oil and stir until well combined, using your hands if necessary – it should be thin batter. Spread a thin layer of butter in the middle of a dinner plate. Drop about 3 level Tbsp of batter on the plate. Using wet hands spread batter from the middle to the outer edge until it is the desired size and very thin. Have nearby a flat bottomed bowl or plate nearby for when the tortilla comes out of the oven. Microwave for approximately 2 minutes, until the middle is cooked evenly as the outer portion. Immediately press down firmly for a few seconds with the bowl or plate on top of the warm tortilla. Slide off of the plate and let cool. Repeat process until all the batter is used up. Serve or refrigerate in an airtight container.

Almond Pizza Crust

no flaxseed pizza crust

A long time ago Big D and I started a tradition of pizzabeer. No, that is not a typo. We would go to a spot – whether it was in Alaska, Virginia, Nevada, Texas…wherever we were, we would sit and eat pizza, drink beer and have long, winding talks about where we were going together. Sometimes they were about short term goals, other times they were longer term. Regardless, they were talks over food and beverage. Without some effort it is difficult to have wheat free pizzabeer. When making pizza these days we do it at home and we regularly use a wheat free crust figured out a couple of years ago. It is delicious, but includes flaxseed meal and coconut flour, which gives it a nuttier taste than what we like for some pizzas. This version of a wheat free crust is made by relying on almond meal and cheese. It makes for a crust that can hold the excess of toppings we are wont to use, while not adding a ton of strong flavor. Just think about it – when you eat pizza are you tasting the crust, or is it the toppings? I realized when I was pondering pizza that what I missed most was the toppings, not the crust taste, and the ability to pick up a piece of pizza and take a big bite. There was a simple concept I realized a few years ago when trying to eat healthier – if I am craving a food it was important to figure out what I craved – was it taste, texture, occasion or appearance? The craving focus varies by dish, but it was easy to identify for pizza. Other examples include the creamy of ice cream, the crunch of chips, the heaviness and nuttiness of a piece of bread. Now, back to the crust. We stumbled upon this more subtle tasting version one night when we wanted pizza and were woefully short of coconut flour and flaxseed meal. Necessity is the mother of invention, right? Oh, and look at my new pretty! Big D got me a new pizza stone! It is all fancy with an enamel finish that does not stick and gets crazy hot. Works as well as the more porous versions I have had in the past, but much more versatile.

Almond Pizza Crust

4 cups shredded mozzarella cheese
6 Tbsp almond flour
1 tsp baking soda
2 tsp dried parsley flakes
1 tsp dried basil
1 tsp garlic powder
1/2 tsp onion powder
1 tsp sea salt
2 eggs, beaten

Toppings (Used in the picture)

1/2 cup pizza sauce or tomato paste
1 cup mozzarella cheese and cheddar cheese, grated and mixed
20-24 pepperoni slices
1/2 cup black olives, chopped
Sprinkling of finely chopped basil and oregano

Preheat oven to 450 degrees (if using a pizza stone prepare as directed). Combine together in a medium bowl all ingredients except the eggs. When well combined add the eggs and stir with a fork until a moist dough forms. Spread enough dough onto the pizza stone or baking dish to have a layer about 1/4 inch deep. The pizza stone in the picture needs about 1/2 the dough, and since it is preheated the dough begins to soften as soon as it touches the surface. A stone without an enamel finish may not work with this crust. Bake the crust for no more than five minutes, allowing it to set and just begin to brown. Lower oven temperature to 425 degrees. Remove crust from oven and add sauce, toppings and cheese. Return to oven and bake for 10 – 15 minutes, until top is browning. Let cool for about ten minutes, allowing crust to set and toppings to cool. Slice and serve.

Post Navigation