Any Kitchen Will Do

Give me a kitchen and I will cook.

Archive for the month “February, 2013”

Little Cheesy Meatballs

cheesy meatballs_edited-1

Little B requested meatballs. Since there was some ground beef in the fridge, how could I refuse? She wanted to ‘have a conversation’ (her favorite phrase lately) about what else to include in the balls besides meat. We decided on garlic, black olives and cheese. We tossed it all into a bowl and had a blast smooshing it all together with our hands. They were just yummy, especially for me with the spicy sauce on top. Little B ate them plain with a side of veggies. I was tempted by pasta and currently in the absence of spaghetti squash, but decided to serve these meatballs over some sauteed zucchini and top with some spicy sauce, which Little B did not care for. She has a pretty diverse palate, but has not yet acquired a taste for the hot side of spicy. We will work on that. Eat up!

Little Cheesy Meatballs

2 pounds ground beef
1 cup sharp cheddar cheese, grated
¾ cup black olives, chopped
2 eggs
2 cloves garlic, crushed
1 Tbsp dried parsley leaves
1 Tbsp dried basil leaves
1 tsp onion powder
½ tsp cumin powder
½ tsp sea salt
¼ tsp black pepper, ground

Preheat oven to 350 degrees. Set out mini muffin pans to accommodate approximately 40 meatballs (large baking sheets will work too, but the cheese might leak out a bit and leave the meatballs). In a large bowl add all ingredients. Pull up your sleeves up. Using your hands, squish all the ingredients together until well combined. Mold balls to about one inch in diameter and place one in each muffin spot. Bake for about 20 minutes until bubbly. Remove and let cool about five minutes before plating and serving.

To serve the meatballs as shown in the picture, it is easy to prepare stuff while the balls are baking. For the sauce combine a small can of tomato paste and medium size can of tomatoes and chiles (or just diced tomatoes if you want mild sauce). Let simmer with a sprinkle of salt until heated through. For the zucchini, cut up squash in two-inch pieces. Heat 1 – 2 Tbsp of butter, then add zucchini. Saute with a sprinkle of salt and pepper until softened a bit, about five minutes. Add the meatballs on top of the zucchini and under the sauce.

Dolmas

dolmas_edited-1
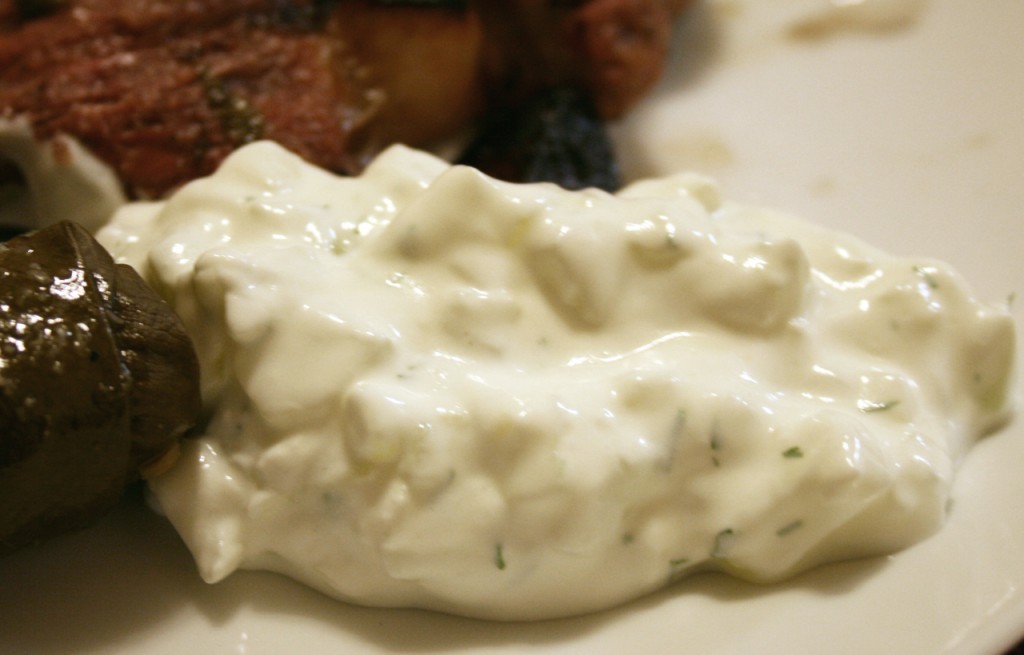
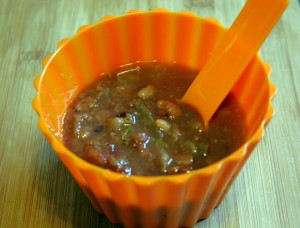
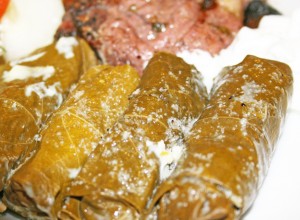
To conclude coverage of our Greek feast I share with you dolmas. Dolma generally means ‘stuffed thing’, and depending on where you are, the stuffed thing is some sort of vegetable – potatoes, squash, peppers, or tomatoes. After room is made in said vegetable they are filled with stuffing made of grains, vegetables and seafood or meat, which is then cooked. In this case we are leaning towards a Greek variation that involves stuffing grape leaves. The grape leaf version of dolmas can be eaten with fork and knife, or picked up as finger food. Personally, my method depends on how long it has been since I last had dolmas. I am more likely to use utensils if my last encounter with dolmas occurred recently; otherwise, fingers it is. To make them healthier and lower the carb count we used cauliflower instead of rice. I always like having dolmas  as part of a Greek meal – they are great hot or cold, can be made in advance (ideally at least the day before), and a plate of them can be easily shared if eaters are willing and generous. I hardly noticed the absence of rice in this version, since the cauliflower gave them a very similar texture to grain or rice. The lemon and egg coating gives them a nice tang, but it does not hurt to serve them up with a dollop of tzatziki as well. If you know me at all you would not be surprised that my dollops are more like glops, but to each her own. Big D helped with the logistics of making the dolmas, especially with separating the grape leaves, which he referred to as “a real pain in the a**”, and with filling them. I was not ignorant to the fact he got such an annoying, leafy task – the poor, innocent guy. Only through this post will he realize my true evil intentions when I sweetly said “can you help for a sec?” We are excited about using the steaming water as a base for soup. Maybe he will forgive me. Yay and Yum! I got some good suggestions for making the dolmas with cauliflower here.

Dolmas

1 8-ounce jar grape leaves (you will probably have extras)
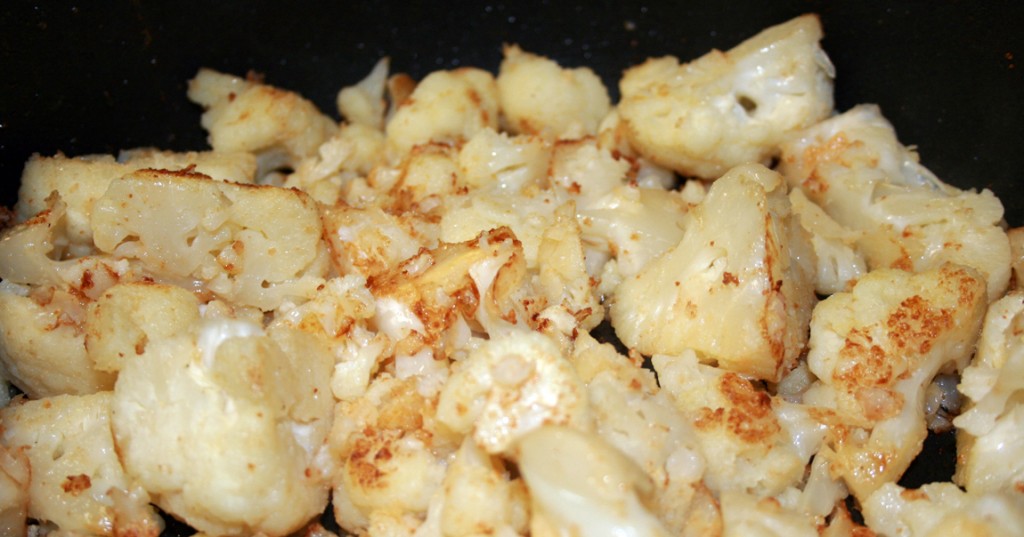
½ head raw cauliflower
½ cup pine nuts (optional)
½ cup raisins (optional)
1 pound ground lamb (or chicken – I know, blasphemy, but can’t find lamb sometimes)
½ medium raw onion
1 Tbsp dried mint
½ cup fresh parsley leaves
2 garlic cloves, crushed
1 ½ tsp sea salt
½ tsp ground black pepper
2 fresh lemons
1 large egg

Carefully remove the leaves from the jar and place in the sink or a large bowl. They are usually tightly rolled together in the jar and can easily be torn. Cover the leaves with hot water and allow to soak at least 15 minutes. Meanwhile, break the cauliflower into florets, removing the stems. Place the florets in the food processor bowl and pulse until the cauliflower looks like rice. This takes about 10 to 15 one-second pulses. Place “rice” in a large mixing bowl and put the bowl back on the food processor; no need to clean it yet.

(Optional) Heat a dry skillet over medium high heat, then add pine nuts and raisins, stirring often and cooking until the pine nuts are lightly toasted, about 3-5 minutes. Set aside to cool, then coarsely chop. Add the nuts and raisins to the rice in the bowl.

Place the lamb, onion, mint, parsley, garlic, salt, and pepper in the bowl of a food processor and steadily pulse the mixture until the ingredients form a paté and everything is combined. I have also used a pastry cutter when a processor is not available – it takes a little longer, but results work. Add the lamb paté to the “rice” and mix well. The easiest way to do this is with your hands: run them under a little cold water and dig in.

In a steamer basket place a few leaves — the ones that are torn or small — to mostly cover the bottom of the pan. There can be some gaps. Put enough water in the steamer base so it does not rise above the bottom of the basket. Cut half of one lemon in half and drop the quarters in the water. Bring the water to a boil while you prepare the dolmas. Drain the water from the rest of the leaves. Place a leaf on a flat surface with the shiny side facing down, veins facing up. Snip off the stem, and place about one mounded tablespoon of filling on the end of the leaf closest to you, where the stem attached before you whacked it. The filling amount can vary, depending on the size of the leaf you are using. Roll from the bottom until the filling is covered by one layer of leaf. Fold in the side flaps and keep rolling until you have a cigar shape. You want to roll them pretty tightly so they don’t come apart during the cooking process. This is different than traditional dolmas where you want to leave a little wiggle room for the rice to expand during cooking. The cauliflower actually shrinks as it cooks, so roll them up tight, but be gentle not to tear the leaves! Place the rolls in the pan and nestle them up against each other. There can be multiple layers if needed, but place the layers crosswise so air can circulate. They will all get cooked.

Cut half of one lemon into thin slices circles and arrange the slices on top of the dolmas in the steamer. Place the filled basket over the boiling water. Cover with a lid, turn the heat way down to a gentle simmer and cook 25-30 minutes, until the leaves are tender but not falling apart. Remove the steamer and pour out the water from the base pot. Replace the steamer into the base.

In a small bowl, whisk the juice from the remaining lemon with the egg until frothy. Remove lemon slices from the top of the dolmas. Pour the frothy mixture over the dolmas, then put the lid back on and let the sauce set. The hot dolmas gently cook the egg/lemon sauce to create a tangy coating.

When the sauce sets, about ten minutes, remove the dolmas from the pan, place covered in the fridge, and wait until they’re chilled. They taste great cold, room temp, or hot — but are best if reheated the day after preparation, rather than eaten immediately when they come out of the pan.

Tzatziki

tzatziki_edited-1

I could just eat this stuff straight from a bowl, with a big spoon, as in “would you like some lamb with your tzatziki”? Forget daintily dipping or drizzling it on food. Sometimes I get a Greek salad just to be able to mix tzatziki in with it. I used to love dipping pita bread into tzatziki and hummus – oh, what a bite exploding with flavor! These days, since I don’t eat pita anymore, I rely on roasted meats and veggies as my tzatziki conduits. Beyond the lovely, tangy creaminess of the sauce, I just like saying the word – tzatziki, tzatziki, tzatziki. I eat salsa with Mexican food, I eat wasabi with sushi, I slather steaks with chimichurri, I put mustard on hotdogs and I top Greek food with tzatziki. So there.

Tzatziki

2 cups plain Greek yogurt, or half sour cream and half yogurt
1 medium cucumber
2 large garlic clove, crushed
1 Tbsp finely chopped fresh mint
2 Tbsp finely chopped fresh dill
1 Tbsp olive oil
2 Tbsp fresh lemon juice
Salt, to taste

Peel, halve and remove seeds from the cucumber, then finely dice. Sprinkle salt on the diced cucumber and let sit for about five minutes. Place diced cucumber it between two towels and press gently to remove any excess water. You may need to repeat with more dry towels to get all the water. In a medium bowl combine yogurt/sour cream, garlic, mint, dill, olive oil and lemon juice. Stir until combined. Fold in cucumber and mix until it is evenly distributed. Add salt to taste. Chill overnight before serving.

Greek Salad Dressing

greek salad dressing_edited-1This post is the beginning of a short Greek-themed series resulting from a feast Big D and I made recently. It is all Big D’s fault. He brought home some beautiful lamb chops one evening and it started us talking about how good they would be marinated in some olive oil, lemon juice and mint. That conversation reminded us about how much we like tzatziki and dipping dolmas in it. Besides grumbling tummies we also reminisced about John the Greek’s Dressing from a restaurant of the same name we like in San Antonio, Texas. The restauruant dressing is great, and I think we figured out a pretty good version. This dressing is tangy with oregano, thyme and lemon dancing around together in my mouth! Not exactly like the stuff by John, but so much better, in my opinion, than Italian dressing, which tends to be sweeter, or straight oil and vinegar. I am still deprived of actually having a salad in Greece, much less experience the dressings used  there, so I am relying on my experiences with family-owned Greek restaurants I have frequented in the U.S. Whenever I come across one I duck in for a good meal. This dressing really stands up to a salad full of strong flavors like roasted peppers, feta and olives. The dressing also works well as a meat marinade.

Greek Salad Dressing

½ cup extra virgin olive oil
¼ cup white or red wine vinegar
¼ cup fresh squeezed lemon juice
2 cloves garlic, crushed
1 tsp dried oregano leaves
½ tsp dried thyme leaves
½ tsp fresh dill
½ – ¾ tsp sea salt
2 pinches freshly ground black pepper

Add all ingredients except oil into a glass jar with at least a two cup capacity. Stir with a fork or whisk until well combined. Continue stirring while adding oil in a thin stream. Stir a bit more after all the oil is added. Let sit overnight in the fridge before using. About ten minutes before serving pull it out to warm up a bit, since the oil may have formed solids. Shake and serve.

King Cakelettes

king cakelettes_edited-1

Laissez les bon temp rouler! Let the good times roll! Mardi Gras is near and as always we are celebrating. We closely followed up defrocking the house of Yule and Christmas decorations with putting up green, gold and purple for Mardi Gras. After living in New Orleans a few years back I cannot help but get in the spirit of Mardi Gras. There is never a lull down there after Christmas – the frivolity of New Years quickly turns to the Mardi Gras celebrations. Parades begin in mid-January so there is no time to waste. Last year I did a king cake marathon, making sure everyone in the house had some for celebrating. I made a regular, yeasty, cinnamon-y king cake, including sharing of details about king cake history, followed by a gluten free version of the cake. They were both delectable and fun to make. This year Mardi Gras arrives during a time when we are highly sensitive to sugar, wheat and carbohydrates. What is a girl to do? Well, adapt. That is what she does. I used my experimenting with low carb muffins over the past year and incorporated my love of king cakes into these little treats. Although not the traditional ring with colored sugar, the result definitely has the right flavors and textures in play. I usually avoid making king cakes most of the year, but this time I may not. These things are stupendous and I doubt they will last us through Fat Tuesday. I really need them to, if for no other reason but to balance the green potency of chartreuse. Enjoy!

Low Carb King Cakelettes

6 eggs
4 Tbsp heavy cream or half and half
1 tsp vanilla

3 drops liquid stevia
½ tsp sea salt
2/3 cup coconut flour
¼ cup golden flaxseed meal
½ cup splenda
½ tsp baking powder
1 cup pecans, shelled

For the Filling
6 Tbsp butter, melted
¼ cup splenda
1 tsp cinnamon
½ cup pecans

For the Icing
1 Tbsp water
1 tsp lime or lemon juice
½ cup splenda
Green, yellow, red and blue (2 drops blue, 3 drops red for purple) food coloring (optional, if coloring icing instead of using colored sugar)

For Decorating
Purple, green and gold/yellow colored sugar or Splenda (or add color to the icing)

Preheat oven to 400 degrees. On a baking pan spread out pecans in one layer. Bake in oven for about 5 minutes until they begin to brown. Prepare muffin pan with liners. In blender add wet ingredients and nuts together. Blend on low until nuts are broken up in small pieces. In separate bowl combine dry ingredients. Add wet ingredients to dry ingredients and stir just until combined. Divide batter among the 12 muffin cups. For the filling mix together butter, ¼ cup Splenda and cinnamon in a bowl. Grind into a powder the ½ cup pecans and combine with other filling ingredients. With a teaspoon drop some filling into the middle of each muffin. It will sink a bit and be covered by the muffin batter during the baking time. Bake for about 15 minutes until tops begin to brown. While the muffins are baking combine the water, juice and Splenda until smooth (make three different batches if coloring it instead of using colored sugar. A soon as the muffins come out of the oven drizzle the icing on top (drizzle all three colors on every muffin if using colored icing). Let cool for about ten minutes. If using colored sugar, sprinkle by alternating green, purple and yellow/gold*. Use all three colors on every muffin. Serve at room temperature or freeze and gently defrost in the microwave before serving.

*I planned on using colored Splenda for sprinkling, and got good information about coloring it here. My color to sweetener ratio did not turn out as well as it did for Millie, I think it was because I did not have enough coloring gel. It was definitely on its way, but I did not have time to go get more with an eager and waiting Little B, so I improvised. I added water and lemon juice to the colored sweetener and colored the icing and drizzled instead of sprinkled. Even though it did not work out this time, I am going to follow Millie’s coloring process in the future, for springtime is coming and more sprinkling opportunities are on the horizon!

Cauliflower Saute

cauliflower sautee_edited-1

Here is another quick way to prepare cauliflower, in case you did not get enough when I cooked it with curry, or that time when I surrounded it with garlic, and don’t forget the time I made it into fritters, then there was the time I mashed it. We eat a lot of the stuff around here, and I don’t see and end in sight. I swear this time it is different, and enjoy it along a spicy or busy main dish. Nutmeg may sound like an odd spice to use outside of a dessert, but it works amazingly well with cauliflower and helps keep preparation simple and flavorful. It is pretty common in Middle Eastern and European dishes to use nutmeg in savory vegetable and meat dishes. After you use it with cauliflower you will understand why. Yum! I like making cauliflower on the stove top when we are in the RV, or whenever the oven is busy cooking the rest of the meal. It is easy to let it basically prepare itself while I am getting other parts of the meal done, then leaving it covered off the heat keeps it warm and ready to serve when you are.

Cauliflower Saute

1 head cauliflower
3 Tbsp butter
2 garlic cloves, crushed
¼ tsp nutmeg
Salt and pepper to taste

Cut cauliflower into bite-size florets. In large skillet melt butter over medium heat. Add garlic and cook for a few minutes until it softens. Turn up heat to high and add cauliflower. Toss so the butter and garlic coats the florets. Cook until the cauliflower begins to brown. Add nutmeg, salt and pepper and continue to toss every minute or so, allowing more browning. When about half the floret surfaces are browned turn heat to low and cover, cooking the cauliflower until preferred softness, about five to ten more minutes.

Whippersnapper Soup

whippersnapper soup_edited-1

Little B loves vegetable soup. I also consider her a whippersnapper. The traditional definition of the term refers to an insignificant or impertinent young person. Such a definition is not what I think of when I use the word. I think it more describes a precocious, inquisitive little one, which is much more in line with Little B’s personality. Her precociousness carries over to her view of soup. Whether it is actually chicken soup or tortilla soup or beef stew, she considers it vegetable soup. Pretty reasonable, I think, since most soup she has seen is loaded with vegetables. Big D and I like soup, too, especially if it has a bit of a spicy bite. I particularly like the limy chicken soup I make on occasion. Our ‘big people’ soup does not always go over well with Little B because her tongue is not yet attuned to hot spicy. I have never served Little B canned soup. I am sure someone has, but canned soup worries me. With the odd, faded colors of the vegetables and the grainy feel of the meat they are a bit unsettling to me. Don’t get me wrong – I grew up on Campbell’s Chicken Noodle Soup and still sometimes crave the salty soft noodles and bright yellow tinge of the broth. I don’t think they taste bad, except for the saltiness of some types, but I like to know where my food comes from, and I feel the same for what Little B eats. My know-where-it-comes-from parameters are certainly not met by canned soup. This soup recipe is simple to throw together and freezes well. I make it regularly, with a variation on the vegetables I add, depending on what is in the fridge. Little B eats three or four bowls a week, often when Big D and I eat spicy food. She even has it for breakfast sometimes. Frozen in two to three cups per resealable bag or container is perfect – enough to have in the fridge when requested without any going bad. Our whippersnapper loves it and it is so good for her.

Whippersnapper Soup

1 pound package 16 bean soup mix, flavor pack discarded
28 ounce can whole peeled tomatoes
4 celery stalks with leaves
2 cups fresh or frozen green beans, cut to 1 inch lengths
¼ head green cabbage
½ small onion
8 ounces ham, finely chopped (optional)
4 cups filtered water
1 – 2 cups chicken or vegetable broth
2 cloves garlic, crushed
1 Tbsp sea salt
½ tsp black pepper
1 tsp ground cumin
1 tsp fresh oregano, chopped

In stock pot or crock pot combine bean soup mix, tomatoes, celery, green beans, cabbage, onion, ham (optional) and broth. Add garlic, oregano, salt and cumin. Stir until spices are combined. Add water and stir a bit more. On the stove top bring soup to a boil then turn down to simmer. Cover and simmer for about four hours until beans and vegetables are soft. In a crock pot, set to low and cook for eight to twelve hours. Serve immediately or store in the freezer for up to three months.

Post Navigation