Any Kitchen Will Do

Give me a kitchen and I will cook.

Archive for the month “August, 2012”

Zucchini Lasagna

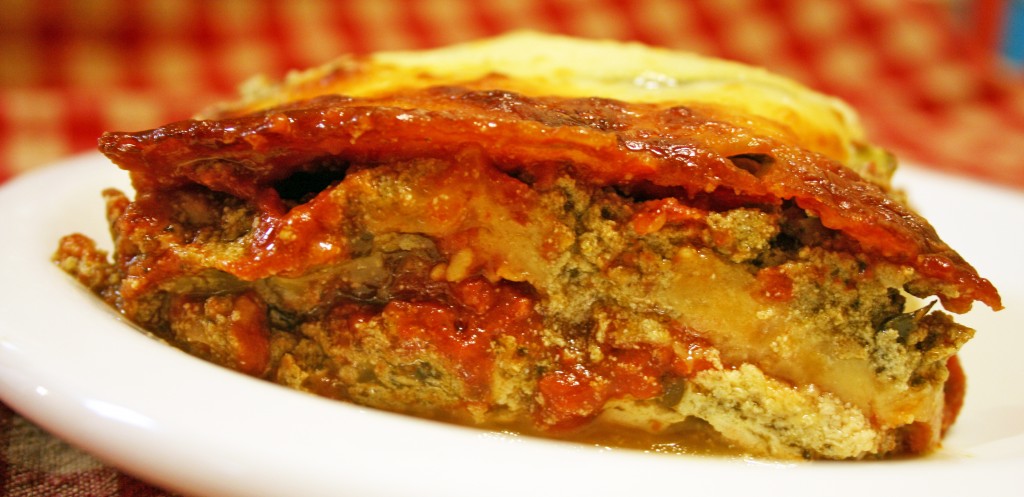
Here is another low carb dish! We are really enjoying the increased level of energy we are experiencing with our current diet, which includes avoiding grains, sugars and processed foods. I am not a die hard fan of most pasta dishes, but I am a lasagna lover. When we traveled in Italy eight years ago I was all about the meat, fish and vegetables – the pasta was, surprisingly to me, not my go to dish while there. Probably because I was corrupted by American knock offs, or because I did not go to Northern Italy, where there is supposedly ‘better’ pasta. I do not really feel like I missed out. Especially in Rome there were almost as many places to get a skewer of roasted meat as there were pizza slices. Go figure. The time we spent renting a villa in Tuscany was sprinkled with visits to the local co-op for freshly butchered meat and freshly picked produce. The cheeses and cured meats were quite an experience, too. Of course, the evil alcoholic concoction we came up with while relaxing the nights away made the eating at the villa a pleasant blur. We would take Coca Cola light (the Italian version of diet Coke) and mix it with some quite horrible tasting Grappa. We did find what I consider very good Grappa before we left, but that first bottle was nasty. Not to waste alcohol, we combined it with the soda and boom! We dubbed our creation Crappa. We got schnockered and did some skinny dipping in the pool. To make a long story short, and totally disconnected to our libation, this recipe takes care of my lasagna craving while keeping me away from the processed carbs found in pasta

Zucchini Lasagna

2 large, narrow zucchini
2 14-ounce cans diced tomatoes
1 small can tomato paste
2 tsp dried oregano leaves
2 tsp dried parsley leaves
2 cloves garlic, crushed
1/2 tsp salt
1/2 tsp Splenda or ¼ tsp sugar
12-15 ounces ricotta cheese
2 cups fresh baby spinach leaves, finely chopped
1 tsp ground nutmeg
1 ½ pounds ground Italian sausage, broken up and cooked thoroughly
1 cup sliced mushrooms
4 cups mozzarella cheese

Preheat oven to 350F. In small sauce pan combine the diced tomatoes, paste, oregano, parsley, onion powder, salt and Splenda or sugar. Bring to a boil over medium heat, turn down flame and simmer for about 15 minutes, then remove from flame and let sit. While it is cooking prepare the rest of the dish. In a medium bowl mix the ricotta cheese, spinach and nutmeg and set aside – trust me – it sounds odd, but the nutmeg enhances the ricotta flavor. Slice ends off of zucchini. With a vegetable peeler peel off long strips of zucchini. If you don’t have a peeler, instead make zucchini coins as thin as you can with a knife. To build the lasagna begin with a thin layer of sauce in the bottom of a 9×13 inch baking dish. Add a layer of zucchini strips/coins overlapping generously to make a solid layer, followed by the ricotta mixture, sauce, mushrooms, sausage and 1 cup of mozzarella. Repeat the layers again. Top with a third layer of zucchini and the last of the mozzarella. Bake lasagna until heated through and cheese on top begins to brown, about 45 minutes. Remove from oven and let cool for about ten minutes, allowing the lasagna to set.
Stuffed Burgers


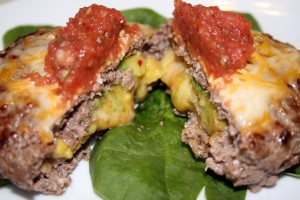
If it can all go on top, why can’t some go in the middle, too? In the world of hamburgers there is a limitless number of topping combinations and I have tried a lot of them. My go to combinations are usually the traditional bacon and cheddar, or bleu cheese with mushrooms. I am not a fan of Hawaiian themed burgers – it is my opinion that pineapple is for dessert, not for pizza or burgers. The more exotic burgers with truffles and seafood are okay, but such toppings seem to pair better with pasta. Sometimes I go for a couple of onion rings with barbeque sauce, but the sauce has to be just right. Although messy, cover my burger anytime with spicy queso dip and guacamole. I will be on it like a bee on honey. As often wont to do, I lean towards a more Tex-Mex theme for this latest dish. I have not made these in a while, so I figured it was time to do so again. These can be pretty messy if eaten on a bun, but that is okay. A good burger is always messy.

Stuffed Burgers

2 pounds ground beef
½ tsp sea salt
¼ tsp ground black pepper
½ tsp cumin
Dash dried red pepper flakes
1 Hass avocado
8 – 12 ounces shredded co-jack cheese
Salsa for serving
Fresh spinach and/or buns for serving

Combine beef, salt, pepper, cumin and pepper flakes together. Remove avocado meat from skin and roughly chop into small pieces. Divide beef into eight portions, then form portions into thin, equal sized patties. On four of the patties add 1/3 of the cheese, avocado and then 1/3 more of the cheese, leaving about ½ inch of meat around the edges. Place the other four patties over the loaded ones, then press together the edges so there is no seam. In a frying pan over medium heat add the olive oil. When oil is hot add the burgers. Cook for 5 – 7 minutes on each side, until cooked to desired doneness. The burgers will not take as long as regular burgers to cook because the cheese and avocado will heat up quickly in the middle. At the last minute add a bit more cheese to the top and cover until melted. Top with salsa on a bed of spinach (or buns) and serve immediately.


Chicken Tomatillo

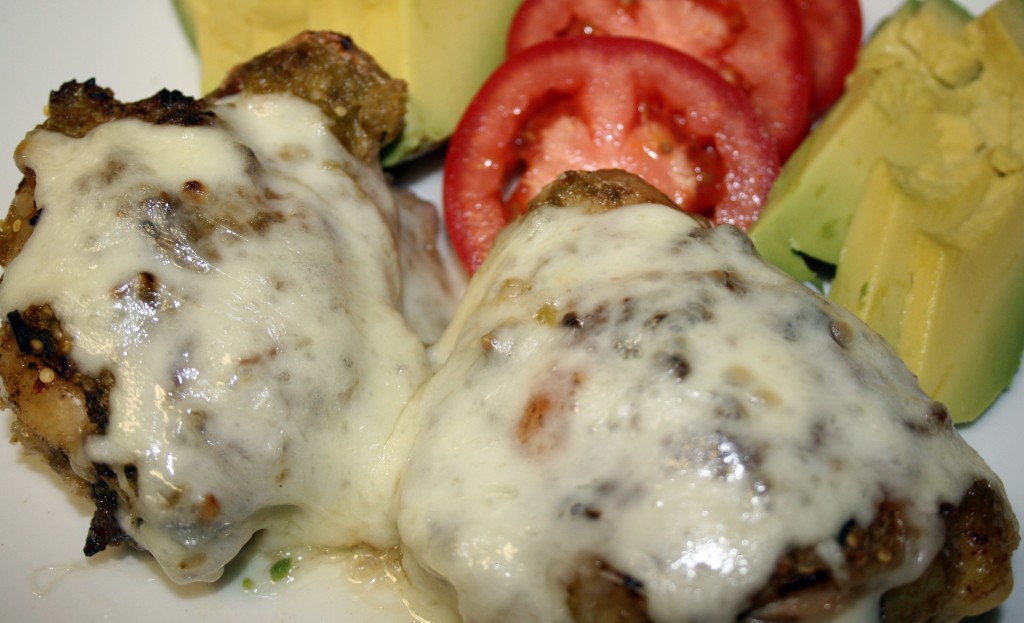
What the heck do you do when you have chicken and some leftovers in the fridge? Come up with something for dinner using them! Duh! After a long day at work I really needed to cook something so I could relax and totally enjoy my family. Cooking, Little B and Big D are what I rely on to balance out the chaos at work. It is a necessity for me to focus on those three things when I get home. It definitely works. I don’t think about work again until the next morning when they are sleeping and I am on the way out the door on the way to the office. I love that it works so well for me. There is nothing better than being able to escape at home. One of my constant challenges is to do something creative and simple with chicken. We are dark meat people, which means packages of legs and/or thighs cooked up for dinner. Recently we had a package of thighs, so I poked around in the fridge and came up with something luscious and amazing for dinner and a couple of lunches at work, which, of course, reminded me of home and let me escape for a bit in the middle of the work day. Yay!

Tomatillo Chicken

3 – 4 pound package chicken thighs, with bone and skin

1 tsp chili powder

1 tsp ground cumin

1 tsp sea salt

½ tsp ground black pepper

2 cups salsa verde with tomatillos sauce

2 cups mozzarella cheese

Preheat oven to 350F. Combine chili powder, cumin, salt and pepper. Get your hands dirty and cover chicken with combined spices. Place chicken in 9×13 glass baking dish. Pour tomatillo sauce over chicken, then top with cheese. Bake uncovered for 45 minutes to 1 hour, until chicken is cooked through and juices run clear. Let sit for about ten minutes before serving.

Chocolate Chia Pudding

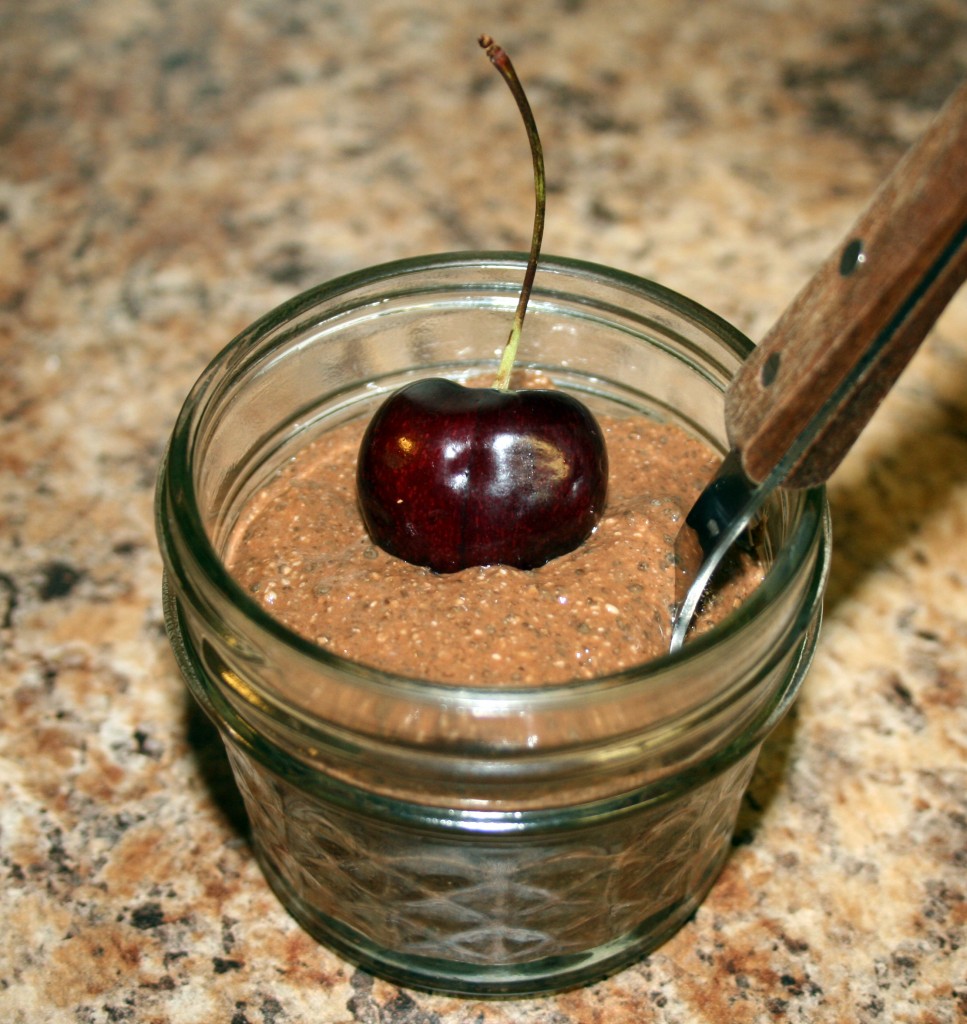
This stuff is quick, sugar free, dairy free and wheat free, but sooo chocolaty and satisfying! We tried a few different combinations of spices and flavors, but this is our favorite. It is kind of the texture of tapioca, and makes for a satisfying, light dessert, taking care of any sweet tooth or chocolate cravings. And go ahead – sing the commercial song while you make it – ch ch ch chia! I always imagine the chia plants you can buy that are grown in different shaped planters – chia plants! The seeds are actually from the same kind of plant. Whip it up in the blender before dinner, stick it in the fridge, then it is cold and ready to eat after the meal. It is just enough for three servings, so double or triple accordingly.

Chocolate Chia Pudding

1 cup coconut milk
4 Tbsp chia seeds
1 Tbsp flaxseeds
3 Tbsp erythritol/stevia (Truvia) powder
4 Tbsp cocoa powder
1 Tbsp vanilla
1 tsp ground cinnamon
Fresh berries (optional)

Combine all ingredients in a blender and pulse until everything is combined – you may need to scrape down the sides to make sure the cocoa is fully incorporated. Let sit for a minute, then blend for about five more seconds. You will see it thicken as it blends. Let chill for about 20 minutes before serving – top with fresh berries if you like. If there are leftovers and you chill them overnight you may need to add more coconut milk and stir it up to thin out before partaking.

Hero Sandwich

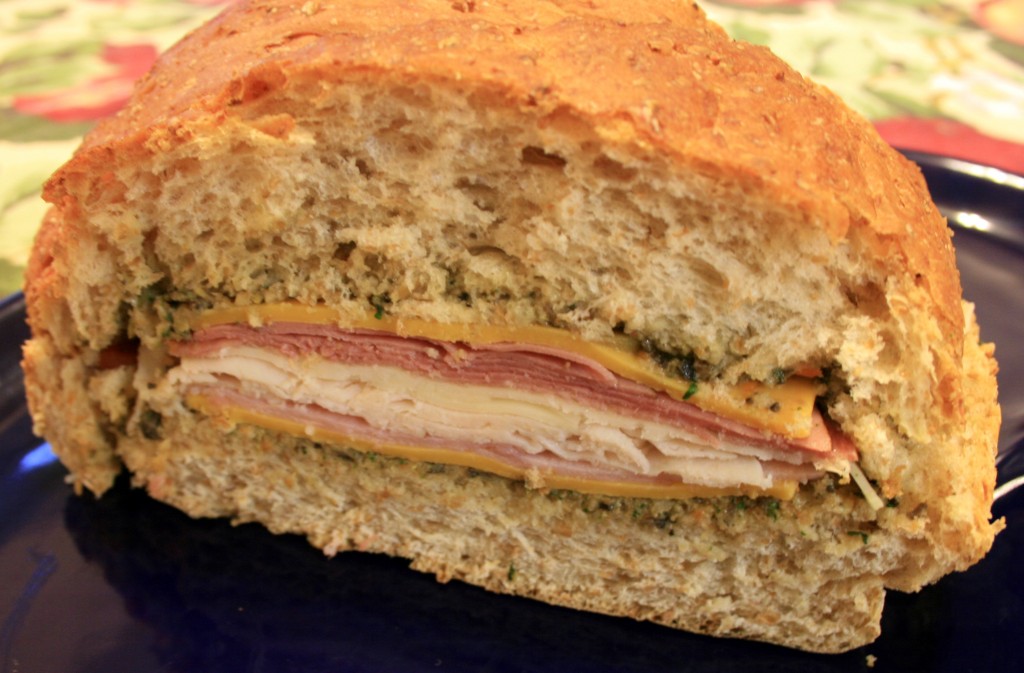
Hero, hoagie, sub…whatever you call it, it is a sandwich with sub-stance of hero-ic size. Heh. I love hero sandwiches, which come and all shapes and sizes, depending on where you are in the country. Personally like my bread/filling ratio about 1:1, but often I find bready versions with a sad amount of filling, so I would feel inclined to pass on such a sad sandwich. For this one I wanted to make sure it was hearty. My friend hurt herself and was laid up for a while. With three hungry sons I felt the need to take over a pile of food. One thing I thought her men (and she) might like was a sandwich piled with meat and cheese. Here is what I came up with, inspired a bit by the muffaletta sandwiches I adore in New Orleans. Yes. They make more than Po’ boys down there. These are quick to make and great for parties and picnics. Have fun at the end of summer and make one for your clan!

Hero Sandwich

1 loaf French bread (white or whole wheat)
1 ½ cups black olives
1 ½ cups green olives with pimentos
3 cloves garlic
1 Tbsp extra virgin olive oil
8 ounces thin sliced salami
8 ounces thin sliced ham, honey or smoked
8 ounces thin sliced roast beef
8 ounces thin sliced turkey, smoked or roasted
6 ounces thin sliced Provolone cheese
6 ounces thin sliced cheddar cheese
6 ounces thin sliced Swiss cheese
6 – 8 long toothpicks

In food processor or blender add olives, garlic and olive oil. Pulse until it is a rough paste, adding a bit more oil if needed. Cut loaf in half lengthwise, leaving one long edge uncut, like a hinge. On the bottom and top halves of the loaf spread half the olive paste, making sure it gets spread all the way to the edges. Begin layering meats and cheeses, starting with meat – beef, cheddar, ham, Swiss, turkey, provolone, salami. Don’t be afraid to pile it on – you can smoosh it down later. If you are ready to serve, add any optional ingredients you like*. Close the sandwich and press down. Add toothpicks so they will be in the middle of each slice (about eight pieces). With a sharp knife or bread knife cut slices 1 – 2 inches thick. If you are not going to serve immediately, wrap the sandwich tightly in cling wrap and refrigerate, then when ready to serve, unwrap, add the toothpicks and slice.

*Optional ingredients (added right before cutting and serving) can include tomato slices, onion slices pickle slices and lettuce. Do not add these ingredients until right before serving, or offer them separately. They can make the sandwich soggy of they sit around in the sandwich for too long, and nobody likes a soggy hero.

Blueberry Coconut Flour Muffins

Little B used to not like blueberries at all. We stopped even offering them to her, then suddenly, they were the best thing since sliced bread! They still come after blackberries, but they rank pretty high with her these days. When we celebrated Lammas a couple of weeks ago we wanted to honor the day with what is typically use of traditional first harvest items, and the recognition that days are getting shorter and cooler. Well, not cooler yet, but linger in the anticipation. First harvest is usually grains; more specifically, wheat. Since we are avoiding wheat there was a need to focus on a more creative symbolic dish. We mixed up some grain free muffins with a different seasonal harvest item – blueberries! They were wonderful accompaniments to the other harvest items on which we feasted: apples, zucchini, pork and wine. We had a lovely evening releasing regrets and looking towards autumn – what I consider my favorite time of year. I used coconut flour again, which has become a favored ingredient in my baking lately – it does not take much to go a long way and it is good for you! I hope you enjoy the muffins, for we did, in all their bluberry-ness.

Coconut Flour Blueberry Muffins

6 eggs
4 Tbsp plus 2 Tbsp (or 12 1/2 tsp) butter
2 Tbsp heavy cream
1/2 tsp vanilla
3 drops liquid stevia
1/2 tsp sea salt
1/2 cup coconut flour
1/2 cup powdered erythritol
1/2 tsp baking powder
8 ounces blueberries

Preheat oven to 400F. Prepare muffin pan with liners. In mixing bowl blend together wet ingredients. In separate bowl combine dry ingredients. Add dry ingredients to wet ingredients and stir just until combined. Gently fold in blueberries. Divide batter among the 12 muffin cups. Bake for about 15 minutes until tops begin to brown. Let cool for about ten minutes before serving.

Update 11/26/12: Little B and I made a batch of these muffins tonight. A tweak made some doubly delicious muffins! We threw all the wet ingredients, along with the blueberries into a blender and whipped them all up together before combining with wet ingredients. We also added juice from half a very juicy lime – about 1/5 cup (very juicy lime). The tweaks made them more moist and the sweet and tang of the berries and juice worked great together. Everything else remained the same in the recipe.

Roasted Asparagus

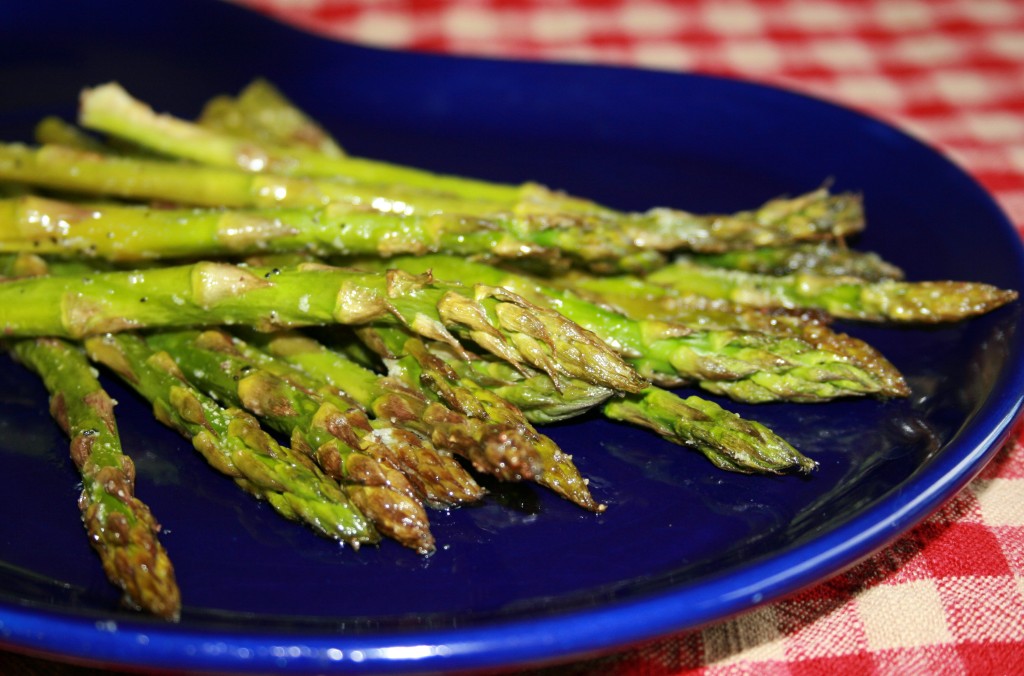
I originally learned this recipe from my old friend Karla. About ten years ago I went over to her house and she made wonderful side dishes while her husband Marcus cooked up some meat. The whole meal was delicious, especially eating under a beautiful summer sky in Denver, but the asparagus was stupendous. It was probably because I had so much trouble cooking it well in the past. I either undercooked it or overcooked it to a green mush. Now it comes out perfectly every time – the thick ends are soft enough to eat and the delicate tips still have substance. The roasting really brings out the flavor of the asparagus while making it tender to eat, hot or cold. I have often taken leftovers on picnics or in cold lunches and it works just as well as if it is right out of the oven. So simple and so scrumptious!

Roasted Asparagus

1 large bunch raw asparagus
2 Tbsp olive oil
2 tsp lime juice
½ cup chopped pecans or almonds
2 cloves garlic, diced
2 Tbsp Parmesan cheese
Salt and Pepper to taste

Heat oven to 350F. Rinse asparagus and remove the thick, tough ends. You can do this in any of three different ways:
1) cut the bottom 1-2 inches off with a knife,
2) bend the asparagus by holding it about half way down with one hand and hold the thick end with the other hand.
Bend the stalk until it naturally breaks where the tough section begins, or
3) with a vegetable peeler gently peel off thick outer skin from the bottom half of the stalk
Line a cookie sheet with aluminum foil. Lay asparagus on foil, alternating thick and thin ends. Make sure the stalks alternate the direction of the tip, so they can cook evenly. Sprinkle asparagus with olive oil and lime juice, followed by garlic, salt, pepper and nuts. Place in oven on the middle rack for 20-30 minutes, until tender. Sprinkle with Parmesan cheese and return to oven, cooking for about five more minutes until cheese is soft. Serve immediately.

Japanese Eggplant Tomato Salad

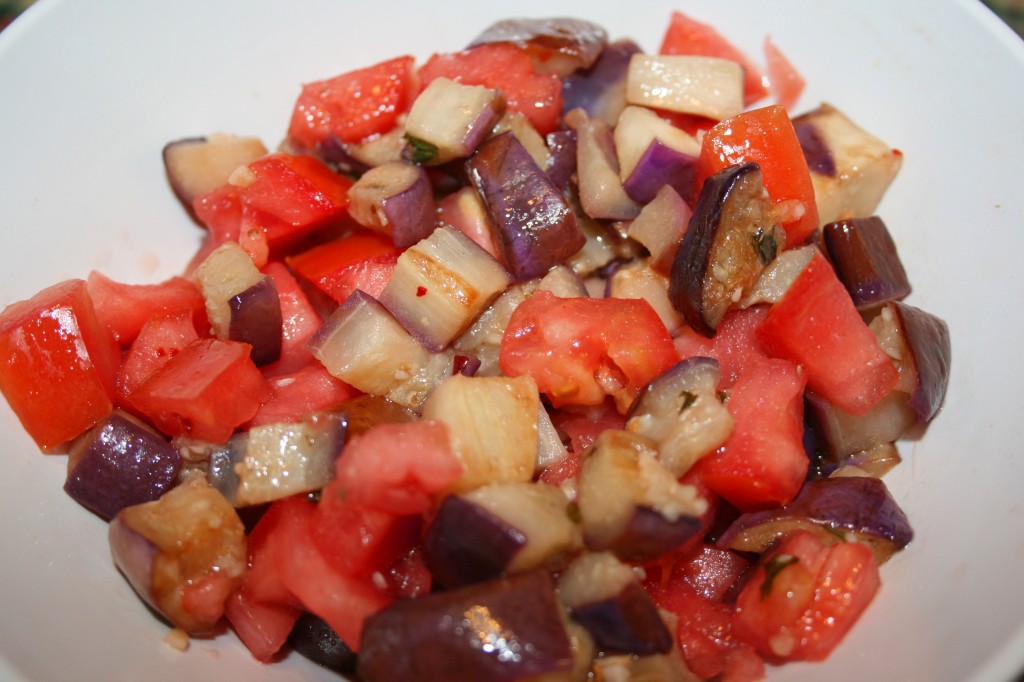
The summer heat has made itself at home in Maryland, for now. I was hopeful that the triple digit temperatures had moved on earlier this week, since the highs dropped into the 80s, but alas, it was not so. They shot right back up. I know it is August, but a girl can hope! I am very much an Autumn/Winter kind of girl – wearing sweaters and pretty scarves, taking brisk walks to get the blood flowing without sweat raining off my brow. Cooler weather will come eventually – it always does – so for now I will trudge on in the heat and make some summer salads. I found some Japanese eggplant at the store this week and grabbed a few. The are longer and more narrow than the typical eggplant, and in my opinion sweeter and more tender. Maybe I need to work with it more, but the short, fat eggplant tends to be tough and lacking flavor when I have prepared it in the past. The Japanese eggplant is more appealing, but also more elusive. I wanted a cold side dish to accompany some spicy tacos for dinner, and this is what I came up with, adapted from the recipe here.

Japanese Eggplant Salad

¼ cup white vinegar
1 clove garlic, crushed
2 tsp fresh ginger, minced
¼ tsp red pepper flakes, crushed
1 Tbsp fresh basil, chopped
1/8 cup olive oil
2 Japanese eggplants
1 large tomato

Cut off ends of eggplants, cut each lengthwise into six pieces, then cross cut into cubes. Sprinkle cubes lightly with salt and let sit for about ten minutes. While waiting for the eggplant make the dressing. Combine the first five ingredients and whisk together until combined. Slowly add oil while you continue whisking until it is all added. Set aside the dressing. Heat dry skillet over medium high heat. Add eggplant and about one Tablespoon of dressing, then saute until tender, about five minutes. Transfer cubes to paper towel and let cool to room temperature, or chill until ready to serve. Cut tomatoes in half and scoop out seeds, leaving as much flesh as possible, then cube the tomatoes so they are about the same size as the cooked eggplant pieces. Combine the tomato and eggplant cubes. Drizzle with dressing and toss lightly to coat. Serve immediately or chill until ready to serve.

Post Navigation