Any Kitchen Will Do

Give me a kitchen and I will cook.

Archive for the month “June, 2012”

Fruity Popsicles

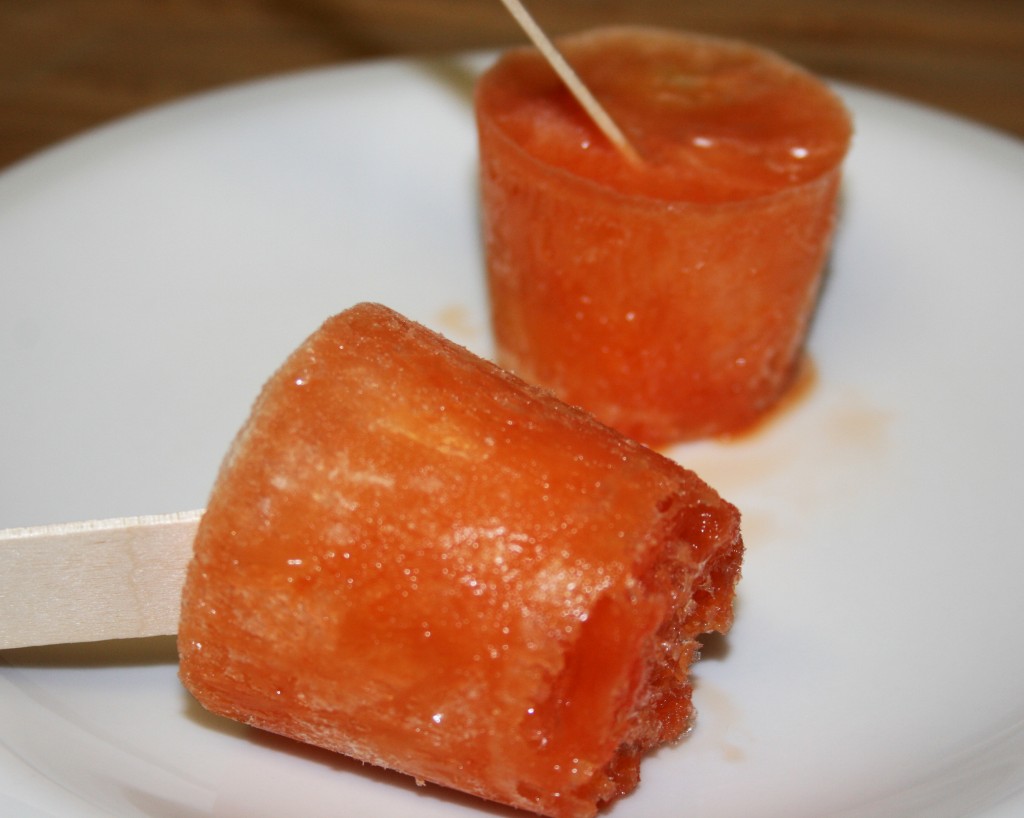
Have you ever realized that full sized popsicles are a bit big for three year olds? The three year olds probably don’t think so, but I have found they can’t quite finish them before they melt all over everything that used to be white or otherwise attractive to staining. I figured I could pretty easily make smaller treats with at least moderate health benefits. I discovered I could! I really could! I also decided to make them ergonomic by freezing the sticks at an angle for easier eating (translation: I was being a bit lazy and and just dropped the sticks in). The angled sticks actually made the popsicles easier for Little B to eat. She loves them. There is at least one serving of fruits/vegetables in each pop, and they are waaaay easy to make. This time I used grapes because that is what we had in the house, but pretty much any fruit cut into small pieces should work (except maybe bananas – they just don’t freeze pretty).

Fruity Popsicles

1 cup pulpy not-from-concentrate orange juice
1 cup vegetable juice (V-8 or something similar)
½ cup seltzer water or club soda
24 grapes, cut in half
12 popsicle sticks
12 itty bitty 3 ounce plastic cups

Combine liquids in a large measuring cup. In a muffin tin place an itty bitty cup in each hollow. In each cup place four grape halves. Divide liquid among the cups. Stick a stick into each cup, letting them rest on the edge. If you want the sticks all perky and straight up, place foil over each cup, then poke a stick gently through the foil, avoiding extra tearing so the sticks stand up. Place in the freezer for at least four hours until frozen through.
Sausage Sauerkraut Parmesan

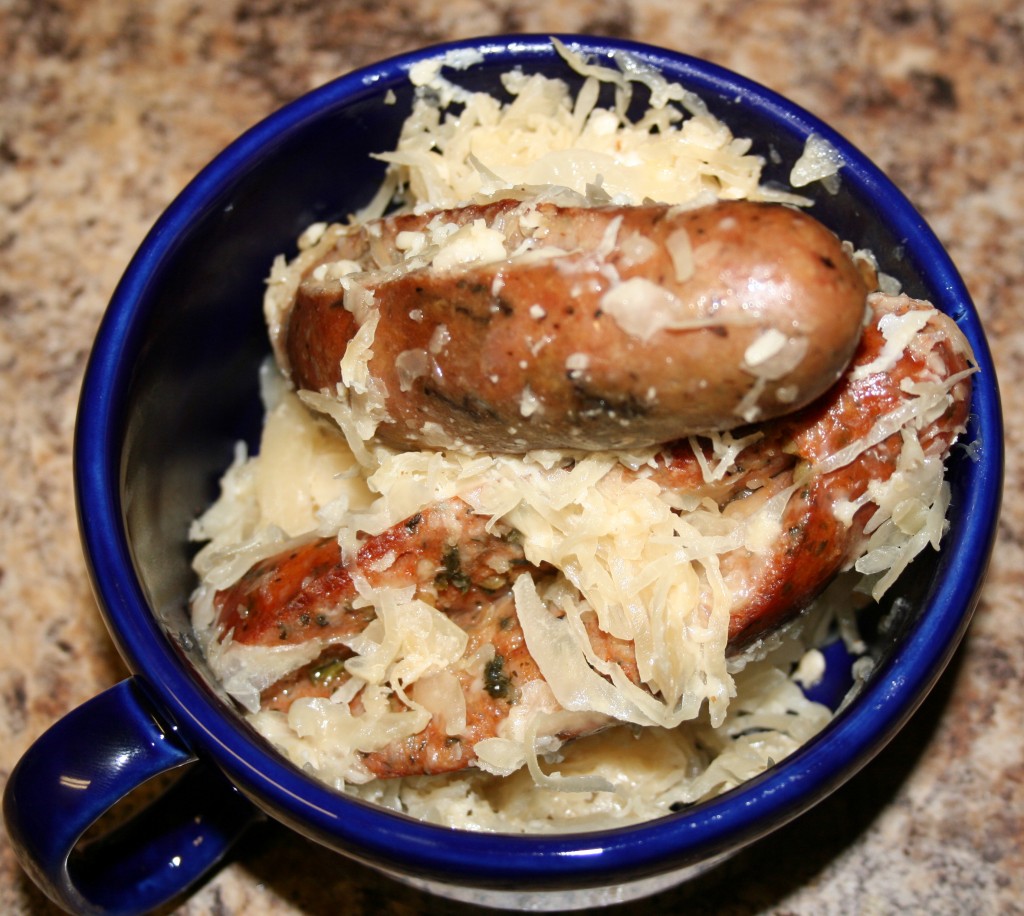
I don’t mean to deceive you with this post. I did not make the sausage, although we have sausage making gear, and I did not make the sauerkraut, although I have made it in the past. I also did not make the cheese, which really brought the dish together. I am really posting about how I combined stuff I never thought of combining and was really surprised about how well it worked together. I have always loved the combination of sausage and sauerkraut, but I just never did much about adding cheese to it. We had some nice fresh Parmesan in the fridge, so after sauteing the sausage and adding the kraut I sprinkled some Parmesan into the mix. Maybe it was the lovely Portabello Mushroom sausages, or the spicy Habanero and Green Chile sausages, but the cheese just seemed to make the whole dish sing. I cannot guarantee that if you use the powdery Parmesan from a plastic shake jar it will have the same zing, but next time you find some Parmesan waiting to be used, toss it in with some sausage and sauerkraut. You may be as surprised as I was with the result.

Sausage and Sauerkraut Parmesan

1 pound sausage links (I used Aidells – yum!)
2 cups sauerkraut (sour, not sweet)
½ cup freshly grated Parmesan cheese

Make a 2” slit in one side of each sausage. Saute over medium high heat until browned on most sides. Add sauerkraut and toss until brown stuff on the bottom of the pan is blended with it and the sauerkraut is hot. Sprinkle cheese over it all and toss until melted. Serve immediately.

Walnut Chicken Salad

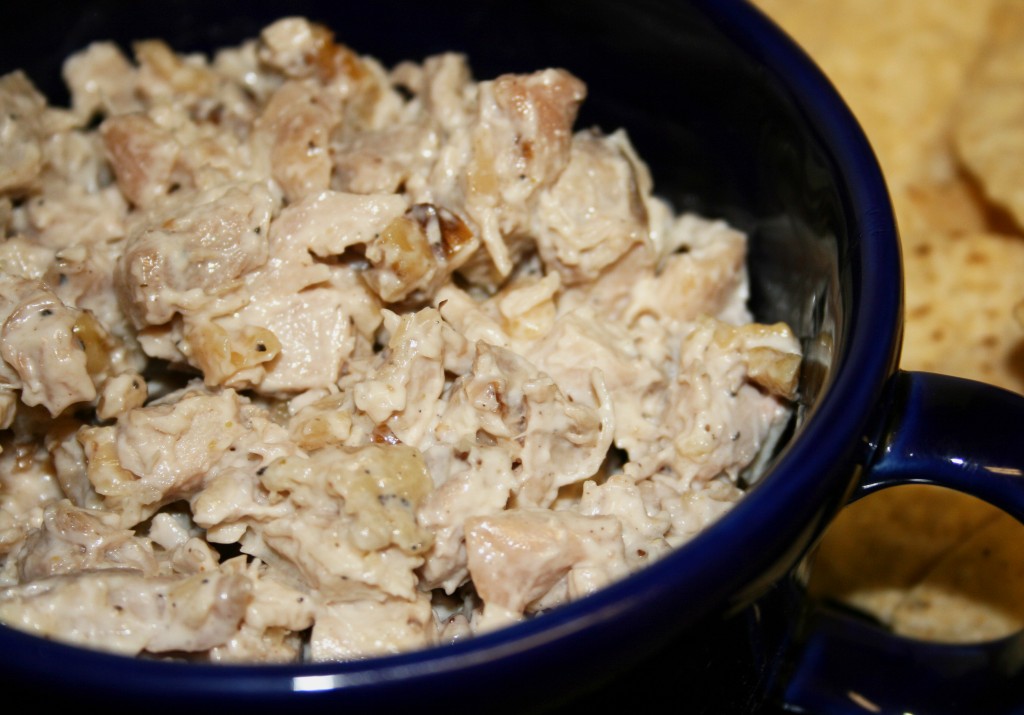
If you have ever been to Washington DC for work you probably noticed in almost every government and office building there is a little cafe on the bottom floor. These little cafes can be addicting. They usually have delicious breakfast and lunch bars that are sold by the pound, and are extremely convenient. Before going upstairs to do your business you get your little to go container and pick bits and pieces from the display of food. A little pasta salad, a bit of roast chicken, a spoonful of sauteed green beans, a pile of fruit and a couple pieces of sushi. What usually happens for me is my eyes are bigger than my stomach and I end up eating my selections for lunch over two days. Since there are little food bars in so many places they have to compete with each other, so keeping the selections flavorful and offering daily specials make you want to come back for more. This week I have meetings away from my office and for lunch I scooped up some chicken salad at one of the cafes. I expected it to be pleasant, like most food bar choices tend to be, but boy was I surprised. The light brown bits mixed with the chicken weren’t pieces of fruit like I expected, but walnuts! The sweet fruity taste I expected ended up being a nutty, savory flavor that blended wonderfully with the dressing and chicken. I don’t know what was actually in the salad, but I ate the rest of it slowly, savoring each bite and trying to figure out what else was in with the chicken. I think I figured out a pretty good replica of my lunchtime discovery, which is a good thing, because starting next week I will be back in my regular section of the metro area partaking from a completely different food bar. I may never have a chance to experience the surprising salad ever again. That is, unless I keep making it for myself.

Walnut Chicken Salad

4 – 6 cups chicken, cooked and diced
1 – 2 Tbsp broth retained from cooking the chicken*
¾ – 1 cup mayonnaise
1 tsp cumin powder
1 cup raw walnuts, chopped
Salt to taste

In mixing bowl combine mayonnaise, cumin and walnuts. Add some of the broth to thin out the mixture to the consistency of thick salad dressing. Add chicken and toss with dressing. Chill overnight before serving.

*If you use the express route and dice up a quick grocery store roasted chicken, just scoop up some juice from the container, as long as it is watery and will help thin out the dressing.

Purple Cauliflower

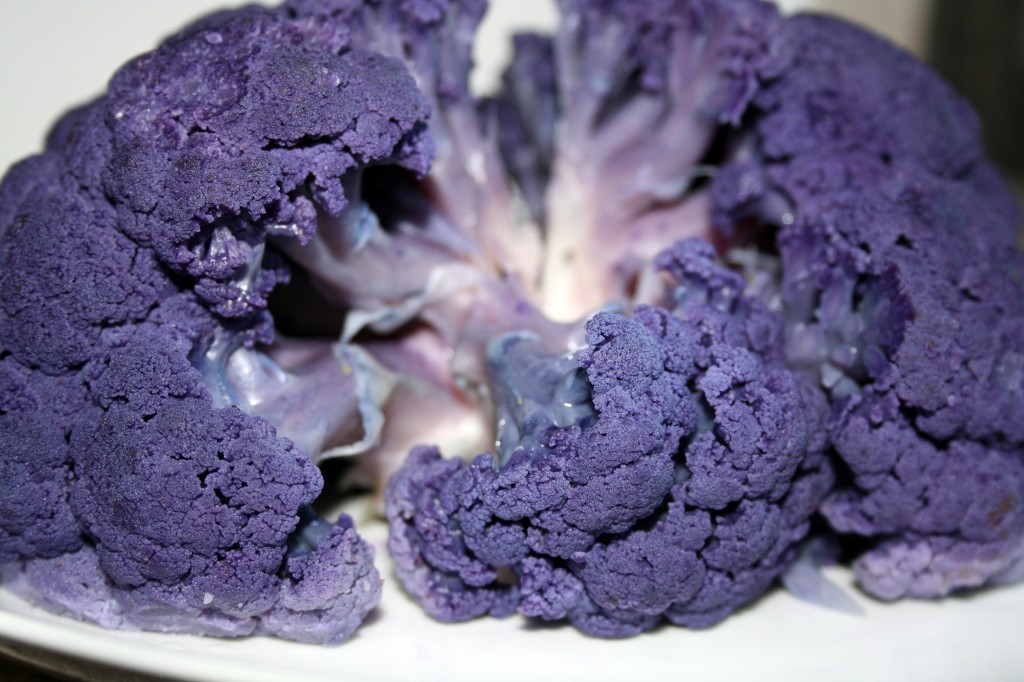
With my new job rolling along and Big D deep in his ongoing projects we have not been as creative with our food preparation as we are wont to be. The wonderful selection of fruits and vegetables available at the local markets is starting to get me out of my rut. As we settle into our new routine I am getting back into my creative food groove as well. The wonderful cauliflower we found recently does not need fancy preparation, so I kept it simple. If you are looking for a colorful vegetable to brighten up a drab, brown dish, then look no further than purple cauliflower! Little B could not stand to walk away from it at the farmers market without buying a head. Now, you might think the almost toxic color of it must be fake, but it is actually naturally occurring, caused by the same antioxidants that make some cabbage and wine have a purple hue. While cooking it up is similar to the plain white version of cauliflower, the purple stuff seems to be more tender and have a more powerful, nutty, buttery flavor that the white stuff lacks. The color definitely bleeds when cooked, so if you don’t want your whole dish purple, and you want to keep the purple from fading, it is best to cook it separately and use my stand up steaming technique. You can see in the picture that some of the lower florets dropped while being cooked and faded a bit after hanging out in the water. If the stem is too short to hold it above the water you can use a steamer basket. I prepared it simply to balance out a spicy meat dish, but if you want more punch with your purple cauliflower, there are some delicious sounding recipes here. Enjoy your colorful side dish!

Purple Cauliflower

1 large head purple cauliflower
1 – 1 ½ cups water
1 tsp salt

Trim bottom of cauliflower stem, but leave the head intact. Place water and salt in large pot that will hold the whole head. Bring water to a boil, then place the cauliflower standing on the stem in the pot. Cover and steam for about 10 minutes, until tender. Serve immediately, either as a whole head (stems will pull off easily) or after cutting into pieces.

Spaghetti Squash with Meaty Sauce

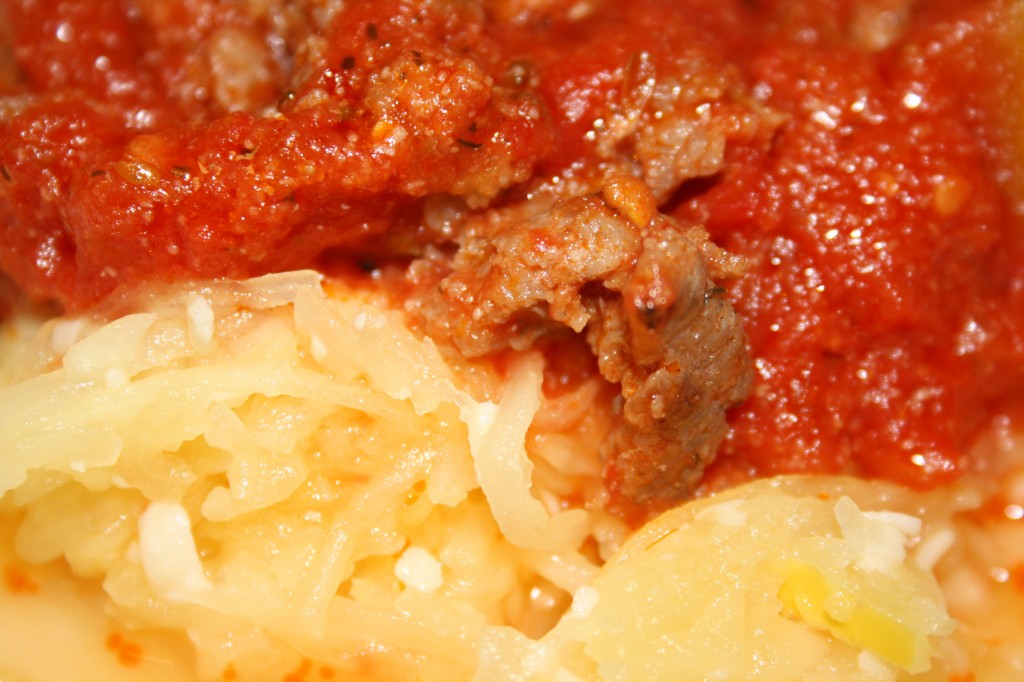
This is a down and dirty delicious weekday dinner. It uses some basic kitchen pantry ingredients I have on hand pretty much all the time. The first time I had spaghetti squash I did not like it. I think I was about ten and very much looking forward to pasta. It was crunchier and the flavor is very much squashy – of course I was comparing it with soft cooked pasta, so of course it would be different. As I got older I began to appreciate it more, and now love it! We used to try and boil it, which took forever, but then we discovered the microwave method, introduced to us by my mother in law. Of course the sauce would benefit from simmering for five hours, but it was delicious with just 20 or so minutes. I will be doing more quick dishes in the future, and am inspired by my friend Stacie’s blog. Besides her awesome food ideas she also makes wonderful lotion.

Spaghetti Squash with Meaty Sauce

1 medium spaghetti squash
¼ cup parmesan cheese
1 Tbsp butter
2 14 ½ ounce cans diced tomatoes
2 cloves garlic, diced
2 tsp dried oregano
1 tsp salt
½ tsp sugar
1 pound ground sausage

In a medium sauce pan over medium heat combine tomatoes, garlic, oregano, salt and sugar. Cover and cook until bubbly. While tomatoes are bubbling away add sausage to a frying pan, break up the meat and cook until browned and well done. Drain sausage and add it to the tomato sauce. Simmer for 10-15 minutes until the flavors have time to mix. Cut spaghetti squash in half lengthwise. Scoop out seeds and stringy membrane. In shallow baking or pie dish add about ¼ inch of water. Add half of the squash, cut side down. Cover with cling wrap and place in microwave. Cook on high for about eight minutes, until squash is soft. With a fork scrape out inside of squash, pulling stringy ‘spaghetti’ out of the shell. Place squash in bowl with butter and cheese*. Stir together and let cheese and butter melt. Serve sauce on a bed of squash.

*Sometimes the squash soaks up some water. If you want to avoid the possibility of having a watery plate when serving, you can add a step before mixing the squash with butter and cheese – lay out a couple of paper towels and spread squash out to dry a bit. After doing this you may need to reheat the squash to make sure the butter and cheese melts.


Biscuits and Gravy

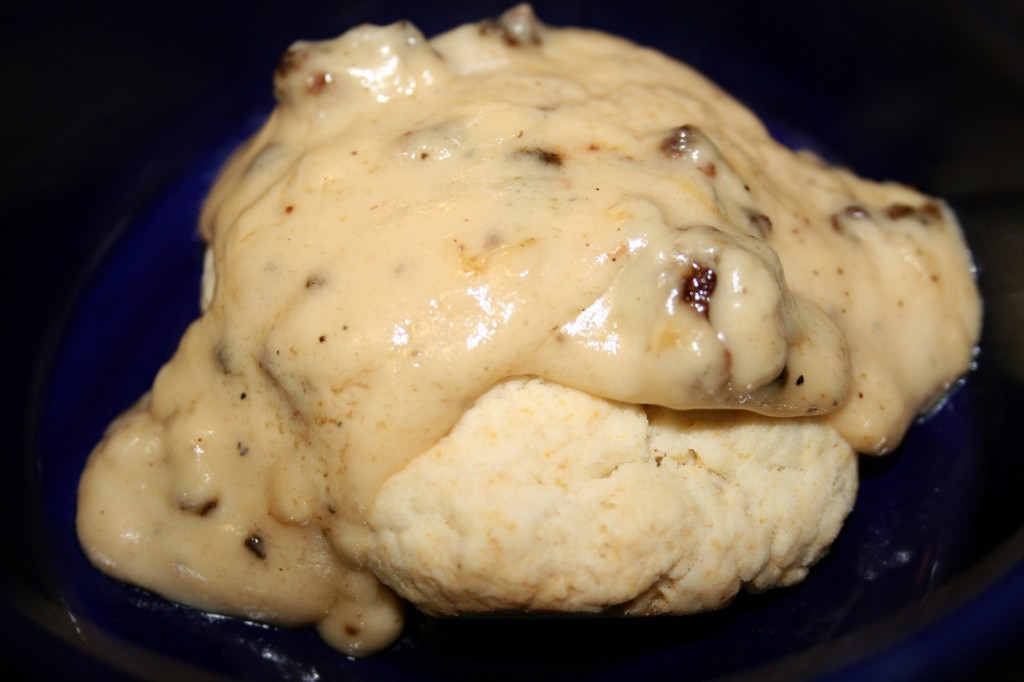
Our foster son, Tall P, is a good old southern boy. He loves his sweet tea, meat, mac n cheese and of course biscuits and gravy. We went to a diner for breakfast last week and he really wanted some. The plate came out and he dove in, but was sorely disappointed. The gravy was tasteless and the biscuits were mediocre. For anyone it would be a let down, but for someone who really likes good biscuits and gravy it was even worse. He looked so sad. I am not exactly sure where to find good biscuits and gravy in Maryland, so I decided to just make him some. Now, I know how to make biscuits and I know how to make gravy, but I had to grill him about what exactly he likes about a good plate of biscuits and gravy to make sure I did them right for him. Growing up I was never very interested in the dish, because my dad always made SOS (um, stuff on a shingle), which reminded him of Army mess halls. I never cared for the stuff, and frankly, biscuits with white sausage gravy always reminded me of the SOS. No thank you. I must say, my combination of biscuits and gravy came out pretty darned good, and was nothing like the SOS my dad made. Sorry dad, you lose this one.

Biscuits and Gravy

For the Biscuits
2 cups all purpose flour
1 Tbsp baking powder
1 tsp salt
Pepper to taste
1 tsp sugar
1/3 cup oil
2/3 cup milk

For the Gravy
¼ pound ground sausage, with drippings
1 Tbsp butter
2 Tbsp flour
1 cup milk

In medium pan cook sausage over medium high heat until browned, about five minutes. Set aside. Preheat oven to 375. In mixing bowl stir together flour, baking powder, salt, sugar and pepper. Add oil and milk. Using a fork stir together ingredients until well combined and dough forms. On a floured surface roll out dough to about an inch thick. Cut out biscuits with a round glass or dough cutters – makes about nine 2” round biscuits. Place biscuits in buttered baking dish or cookie sheet. Bake for 15-20 minutes until slightly brown on top.

When biscuits are about half done turn the heat back on under the sausage with drippings. When it starts to sizzle add butter to melt. Add flour and whisk together thoroughly with butter, sausage and drippings to make a smooth roux. Let flour darken a bit. Add milk and continue whisking until gravy thickens. When biscuits are ready spoon gravy over them and serve, eating them immediately.

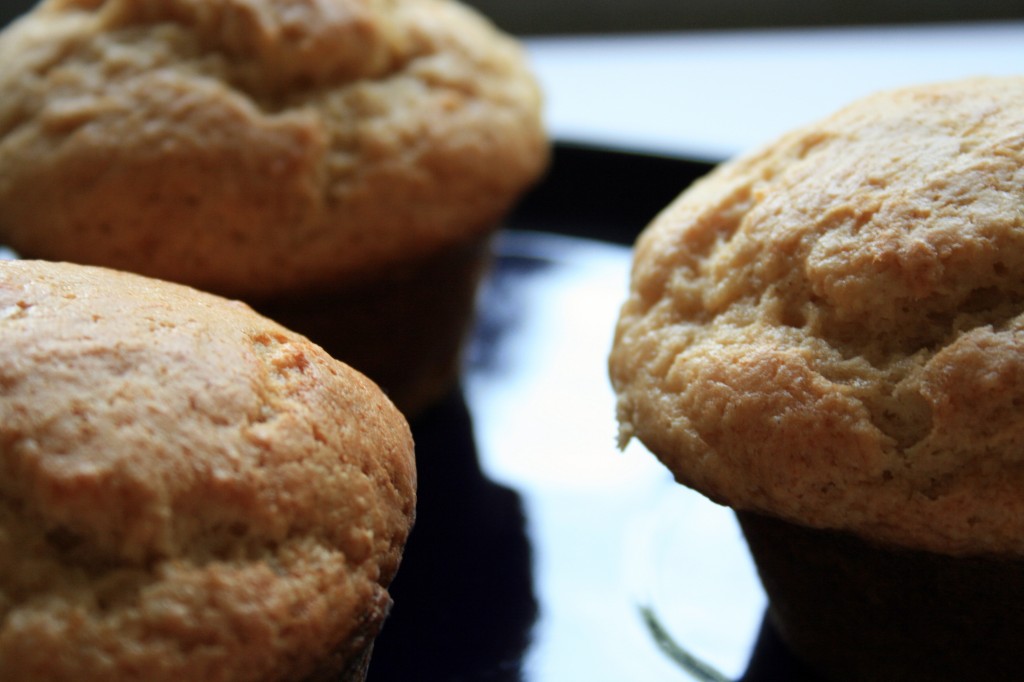
Peanut Butter Banana Muffins

You may have noticed an influx of vegetables and meat in my entries lately. It is because we are watching our carbohydrate intake and there is no subtlety in the absence of starches. Alas, Brigit is still a lover of such things and is at an age where if she shows interest in food I definitely want to make it available. She has a constant interest in peanut butter and a dynamic interest in bananas, so I combined the two into a muffin, based on the still limited stocking of our pantry. She inhaled a muffin after dinner and there is already one packed for her to munch on during tomorrow’s commute, so I think they are a success. Some vitamins and protein are no so bad, in spite of the processed flour and sugar. I will take what I can get with my almost three-year old. Oh yeah, the 17 year old foster son Paul (who thinks it is weird to do a food blog, but finds it totally reasonable to text and IM all day) promises to eat some, but not right after dinner. Teenagers. Ugh. I was not altogether creative on this one – I just wanted to use up the old bananas and have something to make that involved Little B in breaking eggs and smooshing stuff. They came out really great, so go forth and make some muffins! Here is the source.

Peanut Butter Banana Muffins

2 cups all purpose flour
1 cup sugar
1 Tbsp baking powder
1/4 teaspoon salt
1/2 cup creamy peanut butter
2 Tbsp vegetable oil
2 eggs
3/4 cup milk
2 ripe bananas, mashed

Preheat the oven to 375°F. In a large bowl, mix together flour, sugar, baking powder and salt. In a separate bowl beat together the peanut butter, oil, eggs, milk and bananas. Stir the wet ingredients into the dry ingredients just until moistened. Spoon the batter into 12 well greased muffin cups. Bake for 20 to 25 minutes, or until a toothpick inserted in the center of a muffin comes out clean. Makes 12 muffins.

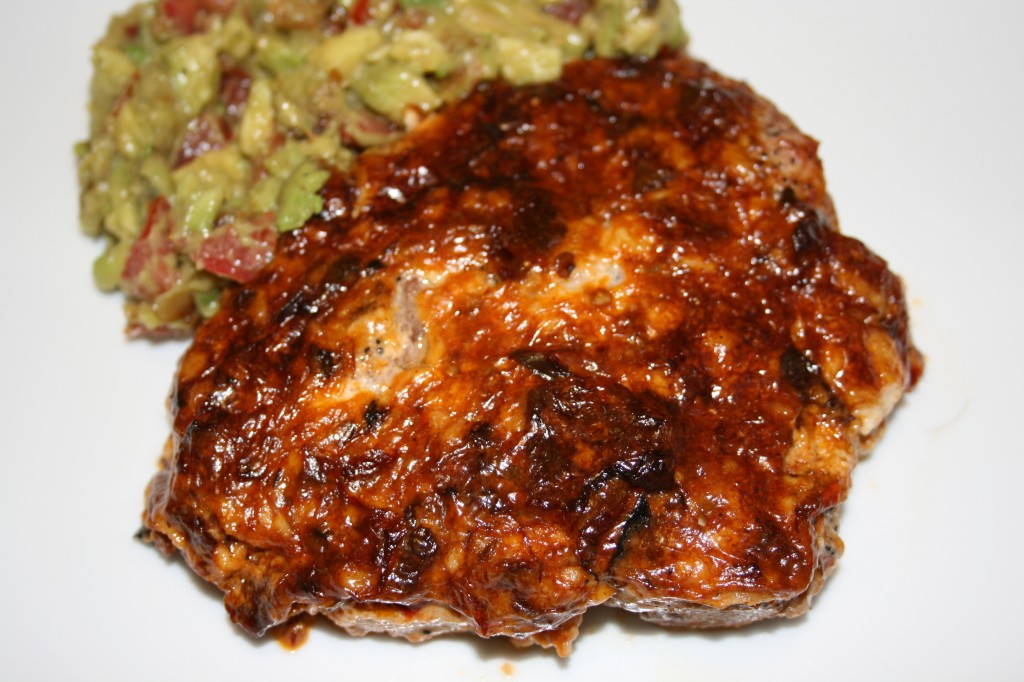
Chipotle Chops

These pork chops are not only pretty, but they pack quite a punch! I was actually inspired to make these chops because we had guacamole we needed to eat before it started turning. One thing that guacamole does is soothe a tongue on fire from spice or balance out a salty chip. The can of chipotles was burning a hole in the cupboard, so I grabbed it and started cooking. We so often use the peppers in barbeque sauce or with red meat, but not so much with pork. It was a nice change to feature the peppers, when we usually use them as an accent. There is no doubt about the smoky heat chipotle peppers possess, so if you don’t like them, just move along and make something else. I don’t say that to be rude, just trying to be realistic – people tend to either love or hate them. If you need an awesome recipe for soothing guacamole to go with your chops you can find one here.

Chipotle Chops

1 Tbsp olive oil
4 bone in pork chops, 1” thick
1 small can chipotle peppers in adobo sauce*
½ cup mayonnaise
1 tsp lime juice
Salt and Pepper to taste

Season pork chops with salt and pepper. Place oil in pan on stove top over medium high heat. Add pork chops and sear on both sides. Remove from heat. Preheat oven to 375 degrees. In small bowl place about three peppers and half the adobo sauce from the can. With a fork and sharp knife cut peppers into small pieces (you can also put peppers and sauce in a food processor to chop). Add mayonnaise and lime juice. Stir until well blended. Place pork chops in a baking dish. Spread sauce over chops. Place in oven uncovered and bake until meat is cooked through, about 30 minutes. Serve with something soothing, like a salad or guacamole, to help soften the spiciness.

*This recipe also works with a small can of green chiles, which will not look as pretty but will be less spicy while remaining flavorful.

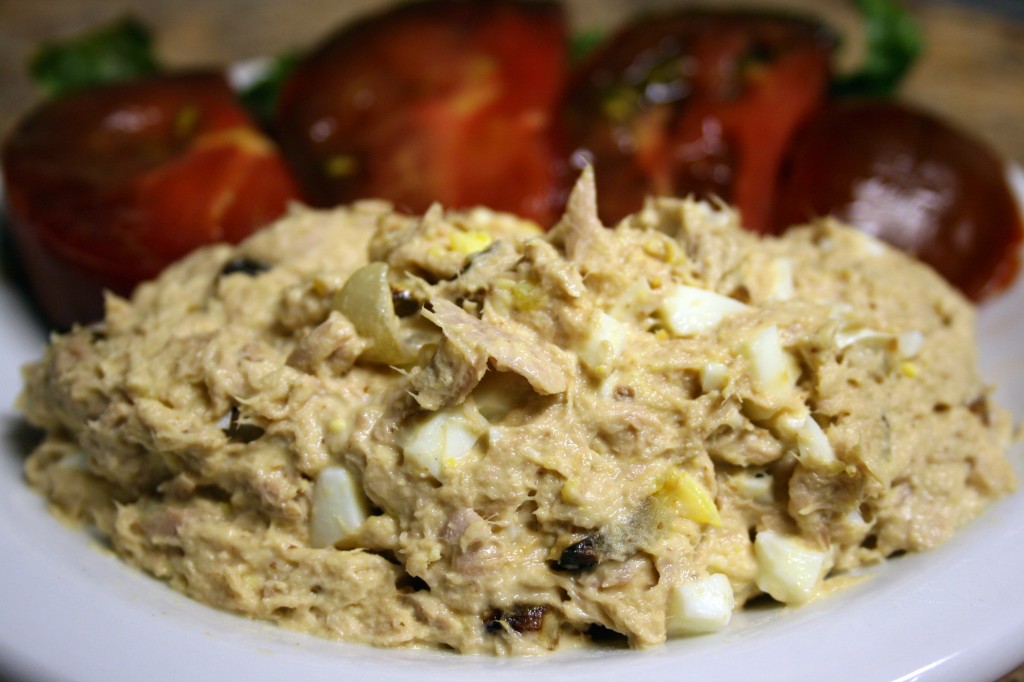
Tuna Salad Sautee

To me summer means eating cool salads. Whether they are cobb, chef, walnut, chicken or tuna, the cool salad always makes me feel happy as the temperatures rise. The word sautee to me sounds like a hot dish, but after the sautee portion of this salad cools off and is chilled, you won’t think of sautee the same again. The sweet of the onion and garlic works really well with the tuna and egg. The bite added by the mustard makes you want to alternate salad bites with those of some chocolate zebra heirloom tomatoes you picked up at the farmers’ market. Oh, that is me. But if you come across some, grab them! They are dark red and purple and green and smell marvelous. The market in Silver Spring was exploding with vegetables, and we could not pass up these tomatoes, which actually taste like a soft red wine to me…kind of a pinot noir or shiraz. They were delish, and went well with my tuna salad sautee creation. Happy summer!!!

Tuna Salad Sautee

4 small cans tuna in water
4 boiled eggs
1 tsp olive oil
½ small sweet onion, finely chopped
4 garlic cloves, finely chopped
½ cup mayonnaise
2 Tbsp horseradish mustard
Salt and Pepper to taste

Heat oil in small pan over medium heat. Add onion and garlic. Sautee until browned and beginning to caramelize. Set aside to cool while the rest of the salad is prepared. Drain water from tuna into small bowl. Place tuna in mixing bowl and serve tuna liquid to eager cats. Roughly chop eggs and add them to the tuna. Add mayonnaise, mustard, salt and pepper to tuna. Stir ingredients until mixed. Add onion and garlic and stir some more until all the dark pieces are pretty evenly distributed. Chill for at least an hour before serving.


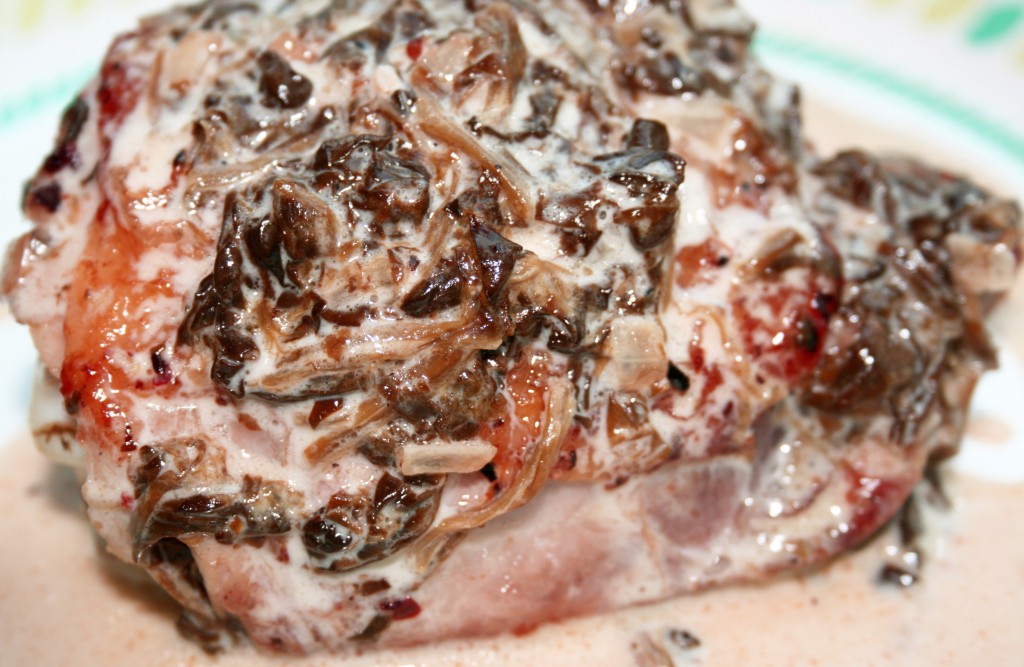
Creamy Spinach Chicken

So today I enlisted a canned good that is very comforting to me. I was one of those kids that loved spinach, and most of the time got it out of the can. When my brother and I started pre-school my mom told me that we came home and would not eat our spinach, but looked at it longingly. Apparently we told her we were not supposed to like it, so we did not eat it. Of course she explained to us that the kids who told us such things just had different opinions about spinach and that we could like it if we wanted to. I don’t succumb to peer pressure quite as easily anymore, and am really glad I chose to like it again. Later in life I learned to love raw spinach and the barely blanched but still bright green spinach. They are delicious, but do not replace memories of the canned stuff I ate as a kid. I still sometimes just open a can and eat it all up, at room temperature, with the sharp lid still attached. Thrill seeker, am I! In my quest to always find a new way to prepare chicken I came up with this lovely, rich dish that incorporates my treat in a can.

Creamy Spinach Chicken

8 – 10 bone-in chicken thighs, skin attached
1 Tbsp butter
1 cup heavy cream
1 small can chopped spinach, drained
½ small white onion, chopped
3 garlic cloves, diced
¾ cup shredded Parmesan cheese
Salt and pepper to taste

On medium high heat sear chicken thighs on both sides, making sure the skin gets crispy, about 10 minutes. While the chicken cooks melt butter over medium heat in a sauce pan. Add onion and garlic and cook until translucent. Add spinach and stir until heated through. Add cream and turn down heat, but bring sauce to a simmer and let cook for about five minutes. Add cheese and stir until melted and combined. When chicken is done cooking remove from pan and discard juices. Return chicken to pan and pour sauce over chicken. Simmer covered over low heat until chicken is cooked through, about five more minutes. Serve immediately and make sure you drizzle sauce over every piece.

Post Navigation