Any Kitchen Will Do

Give me a kitchen and I will cook.

Archive for the month “April, 2012”

Ketchup

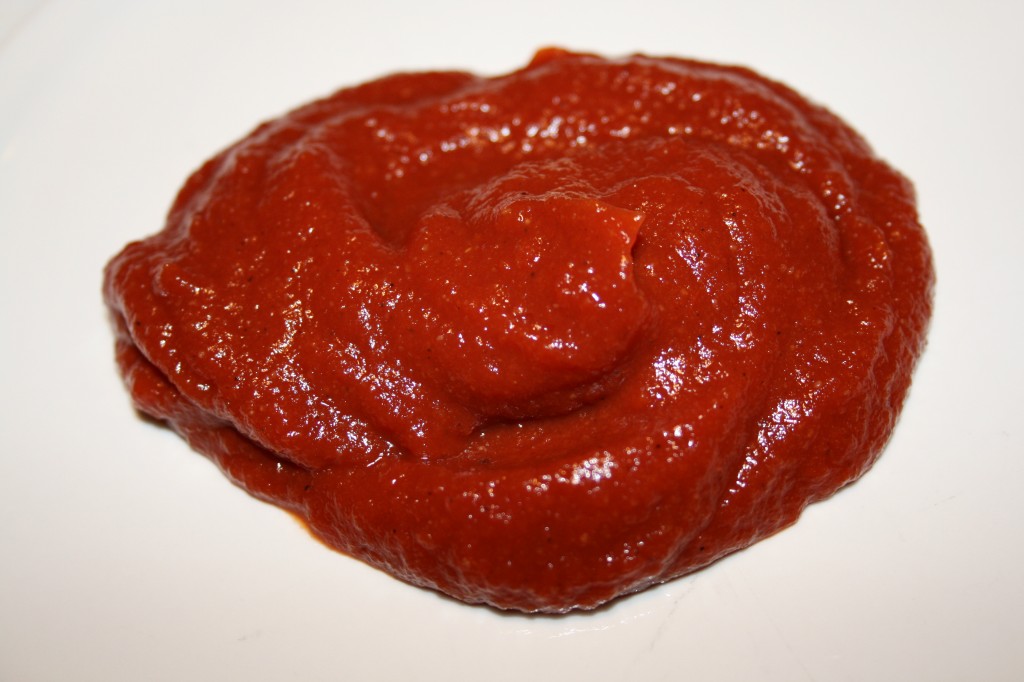
Is it Catsup or Ketchup? I don’t know the difference, but I do know that both of them are red, slightly tangy dipping sauces that are mostly tomato. A while back we had a house full of young people over and fed them burgers, hot dogs and home fries. Our household rarely uses ketchup, so we don’t usually have any around. Ack! No red stuff in the fridge! We got some wide-eyed looks when we declared the absence of the condiment. Instead of running to the store and leaving Big D to host our guests while simultaneously grilling meat, I dove into our pantry and attempted to make a batch of ketchup. With tomato paste as a base it was easy to combine some spices and vinegar to come up with a pretty darned good version. It seemed to do the trick and the party continued without a hitch. I will definitely make this again, and even eat some! Read the preparation instructions carefully. It is easy to get lost in all the steps…

Quick Ketchup

6 ounces tomato paste
¼ cup white vinegar
1 Tbsp garlic powder
1 Tbsp onion powder
Dash allspice
1 tsp salt
1 tsp honey
½ cup water

Combine all ingredients together very thoroughly. Serve.

Wheat Free Pumpkin Cranberry Muffins

Every time we move we try to do two kitchen related things: 1) find a person or household to honor with all foodstuff in the kitchen that may spill or break; in general, not survive storage and transport, and 2) whittle down our supply of perishable foods in the fridge and freezer. Most of the time I scour grocery stores for good deals and stock up when I find them, which means our freezer is often full of bulk items. Don’t get me wrong. I am not a coupon clipper and I don’t pour over the weekly grocery ads, but when I am walking through the store and find a deal I definitely jump on it. In addition to my frozen deals and steals there are odds and ends left over from recipes. You know what I mean – that recipe that did not quite need the last half cup of berries, or the one that called for only half a can of tomato paste. In my attempt to use up stuff in the freezer I came across ingredients left over from the holidays – pumpkin puree and whole cranberries. I know the chilly weather these foods remind me of is pretty much in the past this year, but I went ahead and came up with a lovely recipe using the frozen goodness. Although the ingredients seem to be off season, the results taste quite refreshing and tangy – very suitable to springtime. By the time the kitchen got packed up they were all gone!

Wheat Free Pumpkin Cranberry Muffins

¾ cup butter, room temperature
1 cup white sugar
2 large eggs
2 tsp lemon zest
1 tsp vanilla extract
1 cup brown rice flour
2 cups instant oatmeal, uncooked
1 ½ tsp baking soda
½ tsp salt
1 cup Greek yogurt
1 cup pureed pumpkin
2 cups whole cranberries (pureed the berries should be about 1 cup)

Fill muffin tins with liners. Set aside. Preheat oven to 350F. Place oatmeal in a food processor and blend until it is a rough powder. Combine rice flour, oatmeal, baking soda and salt. Set aside. In a medium bowl combine pumpkin and yogurt. Set aside. In a mixer bowl using a flat paddle, cream together cane sugar and butter just until blended. Add eggs one at a time, making sure one is combined before adding the next. Add a third of the dry ingredients, then a third of the yogurt/pumpkin. Scrape the bowl well. Continue alternating the dry and wet ingredients until all is incorporated. Fill muffin tins about ¾ full. Bake for 20-25 minutes, until tops are brown and beginning to harden. Makes 20-24 muffins.

Purple Hull Peas

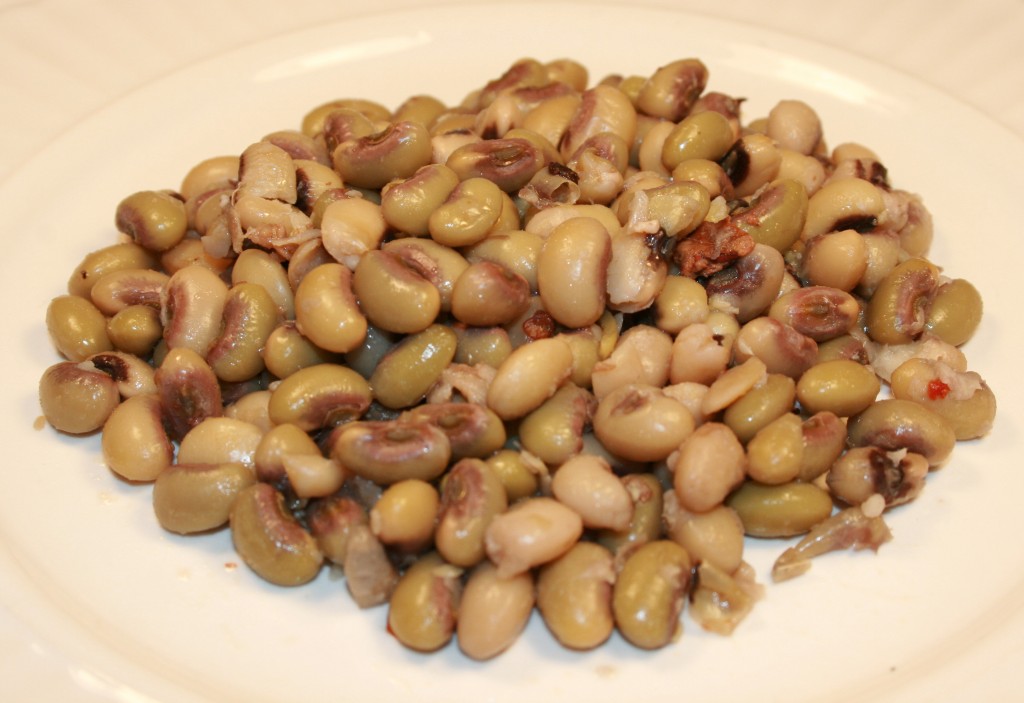
It is really a good feeling when you can plant a garden and fill your freezer with the fruits of your labors. When you move around as often as we do and are not sure if you will be in one place long enough for a growing season, the second best feeling to reaping the fruits of your labors is to benefit from the labor of others. As I mentioned before, we are in the midde of a move…and one process part of each of our moves is the using of all things frozen. My efforts to use up our well stocked freezer supplies revealed a wonderful discovery. I found two bags of purple hull peas from the huge (and I mean huge – over an acre) garden of great Uncle James and Aunt Mary. Each year their garden is smaller and smaller – they are well into their 80s now – I only hope I can garden when I am their age. The purple hull peas are about the size and texture of black eyed peas, but they have a stronger, nuttier taste than their black eyed cousins. I like the purple hulls much better. I don’t recall ever seeing purple hull peas in a grocery store, but found them in abundance at farmers markets and local produce stands. Seek them out and cook them up in a pot. You will not regret it.

Purple Hull Peas

4 cups purple hull peas
1 cup black eyed peas (only because I had a bit in the cupboard)
1 ham bone
1 small yellow onion, finely chopped
1 Tbsp salt
2 cloves garlic, sliced
2-3 quarts water

Combine all ingredients in a pot over high heat, making sure enough water is used to cover the peas. Bring to a boil. Cover and lower heat, but keep a low boil. Cook until peas are soft, about an hour. Remove from liquid with slotted spoon. Serve hot or cold.

Crispy Baked Chips

You want fries with that? Of course, but I shouldn’t…

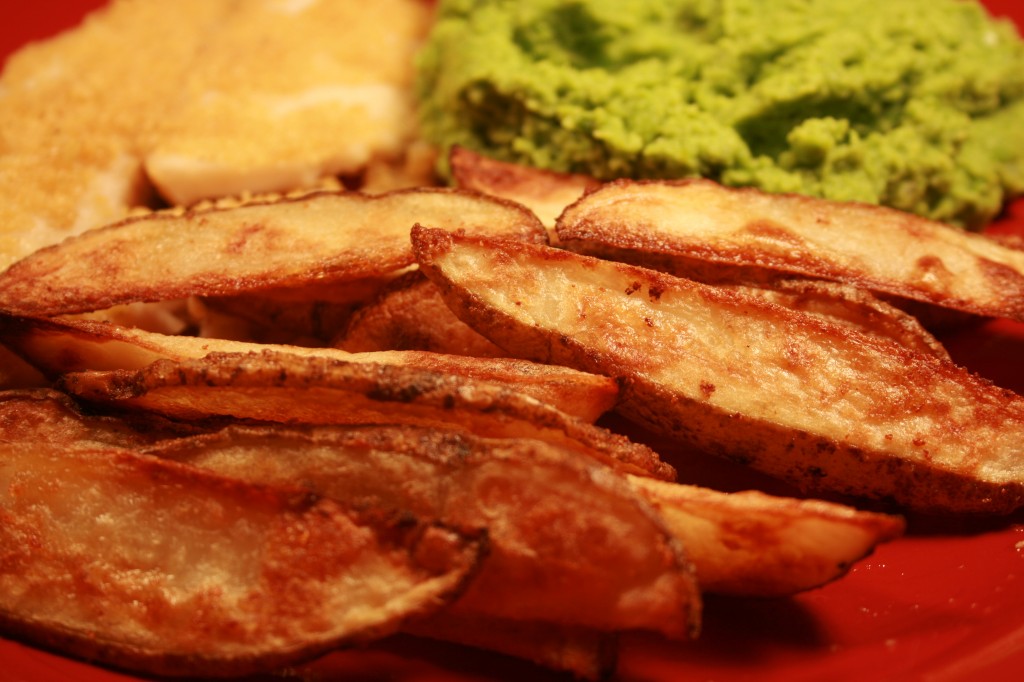
Although I like a lot of foods that are good for me, I also crave some of those foods that are quite lacking in nutritional value. You know, oreos, macaroni and cheese, loaded baked potato and of course the fries. Yum! Usually made with processed potatoes and deep fried, they go well with burgers and ribs and under a pile of chili and cheese. An occasional small serving is no problem, but when they come so easily almost everywhere we eat out – and we eat out quite frequently – it gets harder and harder to resist. One way that helps me is to make some at home, which are just as good or loads better than those found in a restaurant. They cook up so crispy, and the seasoning begs not to be dipped in ketsup, but if absolutely necessary, I guess it could be done. These are chips, as in fish ‘n chips! These little guys taste like they could have been deep fried, but they are baked, much lower fat than their deep-fried counterparts, crispy and addictive! I served them up with mushed peas and some tilapia cooked in a skidge of oil and lime juice.

Crispy Baked Chips

4 small or 3 medium russet potatoes
2 Tbsp canola or olive oil
1 tsp salt
1 tsp garlic powder
Dash of pepper

Wash and slice potatoes into thin wedges lengthwise, approximately 12 per potato. Soak slices in a bowl of cold water for 10 minutes. Preheat oven to 425F. Lay out wedges on a towel to dry, pressing down from above using another towel to get as much water off as possible. Place wedges in a bowl and sprinkle with oil, salt, pepper and garlic, tossing until completely coated. Spread wedges out in one layer on large cookie sheet. Bake in oven for about 20 minutes. Flip wedges over, rotate pan 180 degrees to ensure even baking and return to oven for 10-20 minutes. The second baking time varies so much because the size of the wedges may vary. By the time the first bake time is over the potatoes will be cooked – the second time is to ensure complete and utter crispiness. Serve immediately. The recipe can be easily doubled, just make sure you have sufficient cookie sheet space. If doubling the recipe and cooking on two cookie sheets, which probably means using two levels of the stove, you will need to cook them twenty minutes, then switch levels for the additional time to allow for even browning.


Red Tomato Salsa

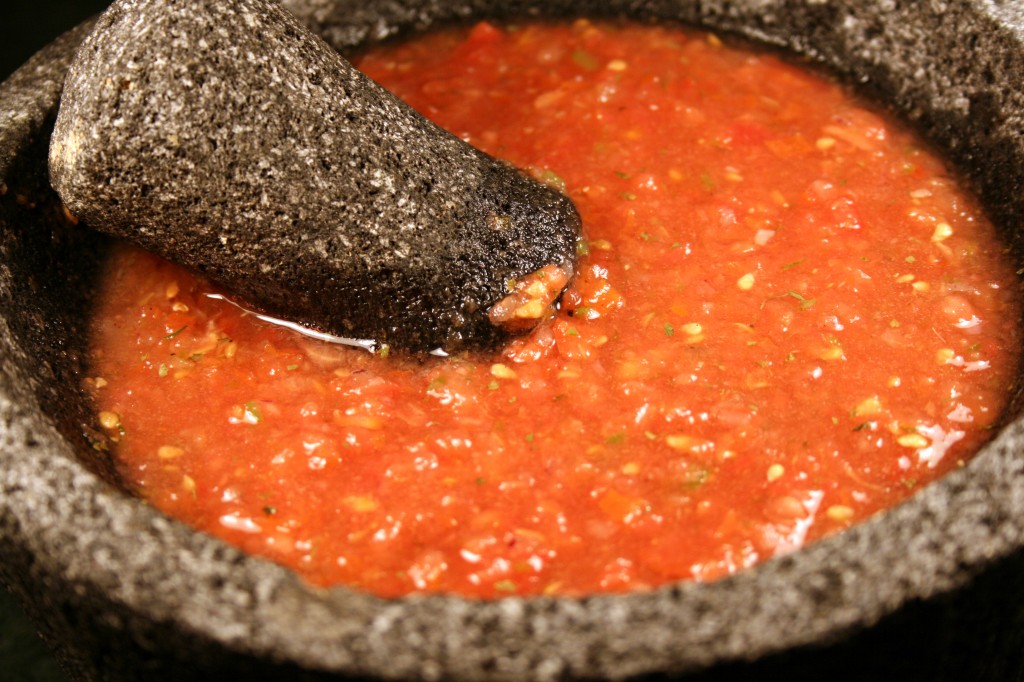
Salsa! It is low fat, low calorie, low sugar and can spice up pretty much anything. I don’t think it can be beat on top of eggs, inside tacos or all around a tortilla chip. I have made it cold, warm, roasted, raw, green, brown (it was actually good) and of course, red. The raw red version is the one that most reminds me of the tex-mex restaurants I like the most down in Texas where I grew up. Each batch is a little different, depending on the quality of the tomatoes and the bite of the jalapenos. This version of salsa comes straight out of the fridge. It is raw, red and tangy. I made the recipe mild, but it could of course be spiced up with more jalapenos.

Tomato Salsa

4 large rip tomatoes, quartered
½ small red onion, roughly chopped
1 large or 2 small jalapenos
1 lime, juiced with meat included
3 cloves garlic
1 small bunch cilantro
½ teaspoon ground sea salt

If you have a big food processor, combine one tomato with the remaining ingredients and pulse until finely pureed. Add remaining tomatoes and pulse until roughly chopped. Refrigerate overnight and serve cold.

If you are going to use a molcajete combine the onion, jalapeno, lime meat, garlic and cilantro in bowl. Grind until all the ingredients are combined. Add tomatoes and continue grinding until combined and the tomatoes are of preferred mushiness. Refrigerate overnight and serve cold.

If you have a small food processor add ½ a tomato and all the other non-tomato ingredients. Pulse until finely pureed. Empty puree into medium bowl. Add tomato to processor and pulse until roughly chopped. Empty into medium bowl. Add tomato to processor and pulse until roughly chopped. Empty into medium bowl. All the tomatoes done? Now stir everything up in the bowl and refrigerate overnight. Serve cold.


Dutch Farmers Market

Since I am still without a kitchen I am going to talk about a wonderful little Dutch Farmers market near our temporary digs here in Maryland. Besides the olive bar you see above that Little B is drooling over (as would my sister in law!), it has an amazing selection of fresh foods. I mean fresh. The air was filled with the smell of baking bread and roasting meat. There were yards and yards of fresh made salads – chicken, turkey, fruit and pasta – as well as hand made desserts and candies. Shelf after shelf of herbs and spices, along with the temptations of popular sweets and drinks. The produce had not a hint of wilting and the fruit was bursting with ripeness. I got so used to relying on chain grocery stores in the small Texas town where we recently lived. I was surprised how much I enjoyed walking through the market and showing Little B all the different parts of the animals, and that chicken legs she loves to devour come from a whole animal. They come from birds, and every part of the bird is used in some form or fashion. Her eyes got big when I let her smell the melons and tomatoes and carrots, none of which spent days wrapped up in plastic which so often can suck the flavor out of produce. The market had row upon row of cheeses and vegetables and fresh baked goods. It is a breath of fresh air – food-wise – that I did not even realize I missed. I am itching to get a kitchen, buy fresh, local foods and have a cooking marathon. Little B is dying to crack some eggs. I am going to continue exploring to local markets to further remind me of the difference it makes to buy fresh and local, and what a difference it makes on my dinner table. Next stop, the Eastern Market down in DC!

Spatchcocked Chicken

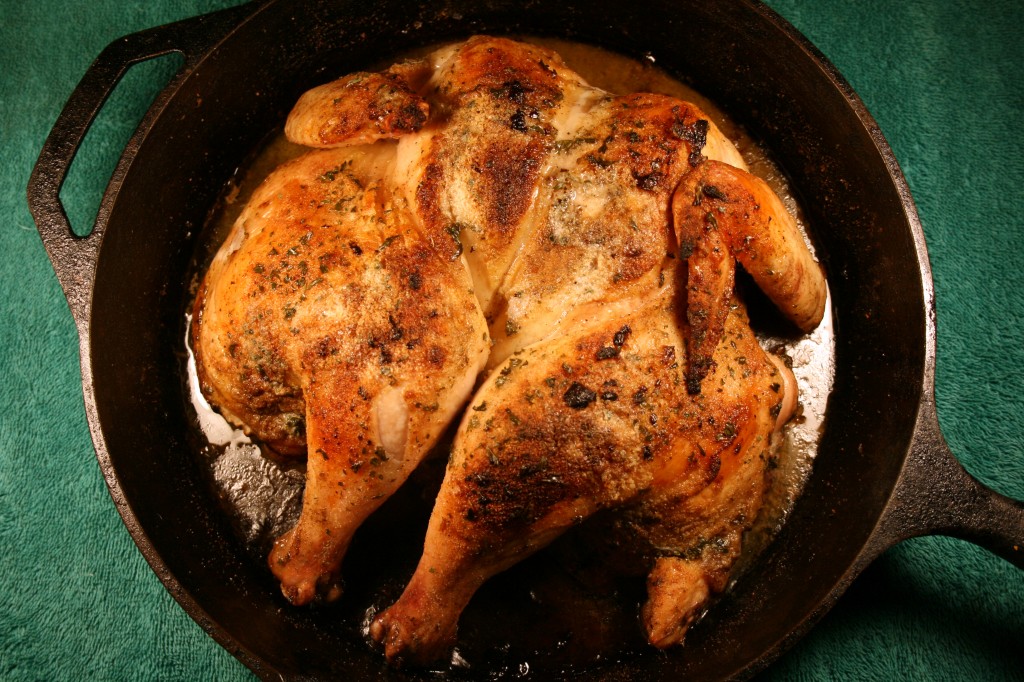
To all those who have trouble cooking a roast chicken please continue reading, for I have a solution for you. To everyone who thinks they have made a good roast chicken you should also keep reading, because you may be wrong. Being able to roast a chicken is a good skill to have, but when you find a big one at the store there is always the challenge of getting the meat evenly cooked, considering the meat is not evenly distributed around the cavity. One solution is sticking it on a full, open soda can and letting the soda keep it moist while standing on end and cooking. The can method works, but to me the meat gets an odd flavor. It might have been the fact I don’t much like Dr Pepper, but it just tasted odd. Splitting a chicken in half and cooking it in an iron skillet results in an amazingly moist, flavorful chicken. Since the bird is laid down almost flat the meat cooks evenly so the dark meat gets cooked instead of running red, and the white meat does not overcook for the sake of the dark meat. It also maximizes exposure of the skin for crispiness. The first time I used the spatchcocked method I did not expect much of a result different from when I roasted with the bird whole. When we started eating it, not only were the herbs and spices more evenly distributed in the meat, but taking the bird apart and carving it up was easier, because it was flat and easier to manipulate. If you try it you will like it, and it is also great for helping to season an iron skillet! Enjoy!

Spatchcocked Chicken

1 whole chicken, 4-5 pounds
2 Tbsp butter, room temperature
1 large lime
1 tsp salt
1 tsp pepper
2 tsp chopped garlic
1 tsp ground cumin
1 tsp onion powder
1 Tbsp chopped parsley
½ tsp ground sage
1 tsp ground thyme

Preheat oven to 375F. Place chicken on a cutting surface breast side down. Using a knife cut skin and meat down to the bone, following the spine. With a sturdy pair of scissors cut right along both sides of the spine to remove it. Turn chicken over and press down in the middle between the wings until the wishbone breaks and the chicken lays down almost flat. Take care not to push it completely flat to the point the ribs break – that is too far. Squeeze lime juice onto both sides of the chicken. Also gently pull skin away from the meat in a few places and drop some of the juice between the skin and meat. If you have fresh herbs you can slide a sprig or two of parsley, sage or thyme under the skin to add some extra flavor. Sprinkle salt and pepper on the bottom (formerly the cavity) of the chicken. Place chicken in large iron skillet skin side up. Get your hands dirty by spreading the butter all over the skin side of the chicken, including crevasses, until it is all gone. Sprinkle salt, pepper and herbs all over butter. Cover with foil and put chicken in oven and cook for about an hour, removing the foil after about 30 minutes. The chicken is done when a thermometer reads 160 degrees and juices run clear. Remove from oven and let rest for about ten minutes.

Greek Layer Dip

We are moving! Actually, we are in the process of moving, literally. I am sitting on a bed in a hotel room, somewhere between Texas and Maryland. We should arrive in Maryland tomorrow, but in the meantime I am without a kitchen. Until I am again armed with a kitchen I will share with you some recipes I collected over the past few months but did not post.

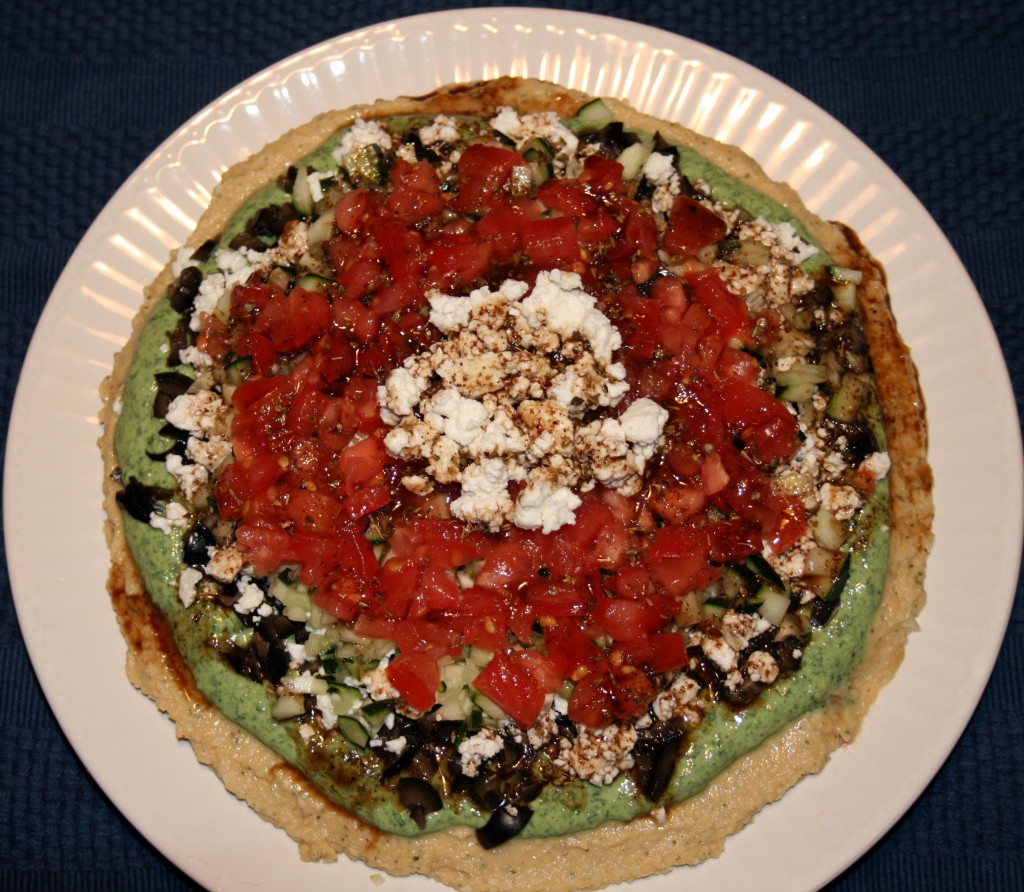
The first one is a dip. Sometimes when a big gaggle of people are coming over I like making available a variety of appetizers so they can nibble as they trickle in to the house. One of my favorites lately, to go along with the ever reliable ranch or peanut dip, is a layer dip. It is high in fiber and very colorful. It can also substitute for a green salad if you have enough Greek lovers. What I like most about it is that if you work hard enough you can get every layer into one bite, but if you don’t, you still get a mouthful of robust flavors that will make you want to seek out another scoop full. With everyone’s vegetable gardens starting to grow (except mine, of course, since I have no idea where we will be living), the dip is a great way to use up some of the bumper crops later this year.

Greek Layer Dip

2 cups hummus
1 cup plain Greek yogurt (optional)
2-3 cups raw spinach
1 cup feta cheese, crumbled
1 cup cucumber, chopped
1 large tomato, chopped
1 cup kalamata olives, chopped
1 Tbsp olive oil
2 Tbsp balsamic vinegar
2 tsp chopped oregano
2 tsp lemon juice
Salt and Pepper to taste

Combine in small bowl the oil, vinegar, oregano, salt, pepper and lemon juice. Set aside. Spread hummus on a serving tray in an even layer, about ¼ to ½ inch deep. Chop spinach into small pieces (and if you are using yogurt now is the time to combine the yogurt with spinach until well blended)*. Spread/sprinkle the spinach on top of the hummus, leaving a visible edge of hummus. Sprinkle olives on top of spinach mixture, followed by cucumber and tomato. Drizzle dressing on top of dip and add some more feta for garnish if you like, then serve. It can be prepared in advance and chilled until serving.

*If you are making the dip in advance I would recommend the yogurt not be used. Depending on the brand of yogurt, it can be a runny layer and will spread if put on the day before. It should be fine if made within an hour or two of serving. I have made it both with the yogurt and without – just sprinkling a layer of spinach makes it look a lot different, but still beautiful and you will still have a moist, dippable dip.

Dilly Egg Salad

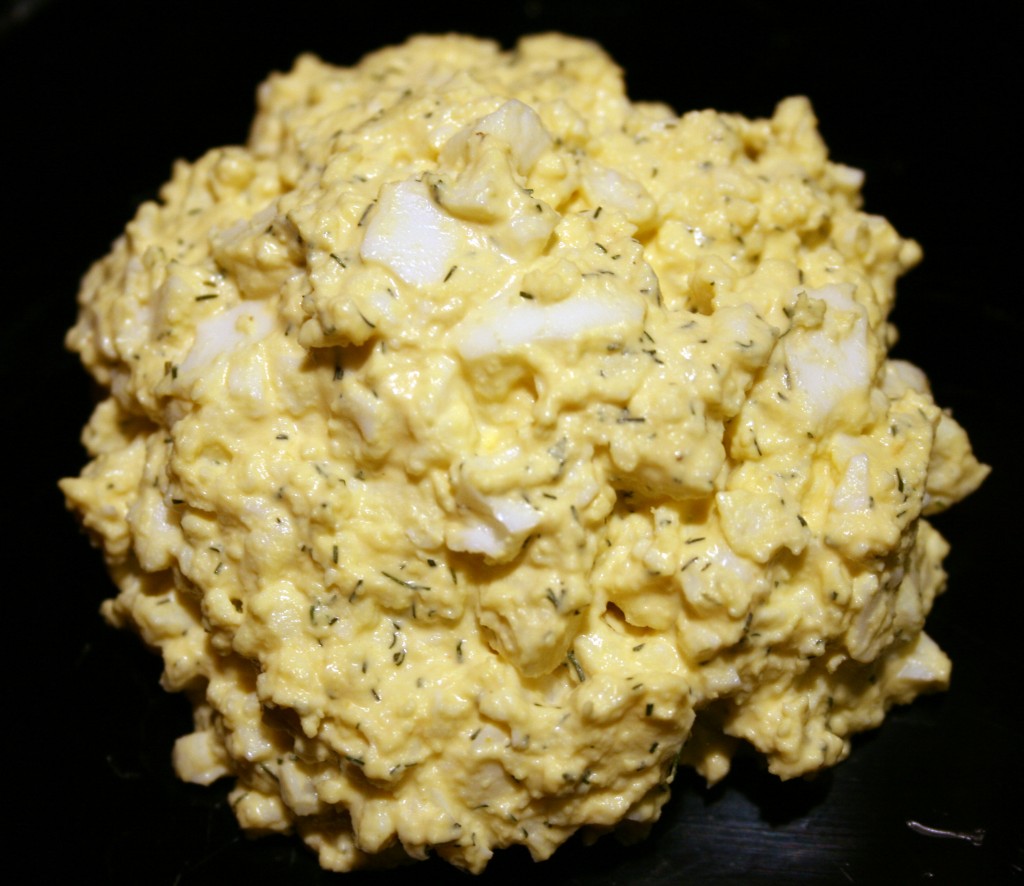
Yes. Another rather unoriginal use for all those Easter eggs that were dyed, hid and hunted (we won’t talk about what happens to the ones that stay hidden, forever. Yech!) After you send everyone home with as many eggs as you can talk them into, there will undoubtedly be some left. Make egg salad! I know this is a very simple recipe that almost everyone can do without direction, but it is still nice to write it down, put together and enjoy the results. I couldn’t help myself after making deviled eggs last week. I even measured everything, because usually I just toss in this and that. It is pretty good, but I just have to remember to brush my teeth before going anywhere. Those garlic and onion powders are really potent! Happy Easter to you and your families!

Dilly Egg Salad

12 eggs, hard boiled and peeled
½ cup mayonnaise
2 Tbsp yellow mustard
1 Tbsp dried dill weed
½ tsp salt
1 tsp garlic powder
½ tsp onion powder

Mash eggs with a pastry blender or potato masher. Make them chunky or finely mashed as you like. Add remaining ingredients and stir until well combined. Refrigerate at least an hour before serving.

Tomato Artichoke Soup

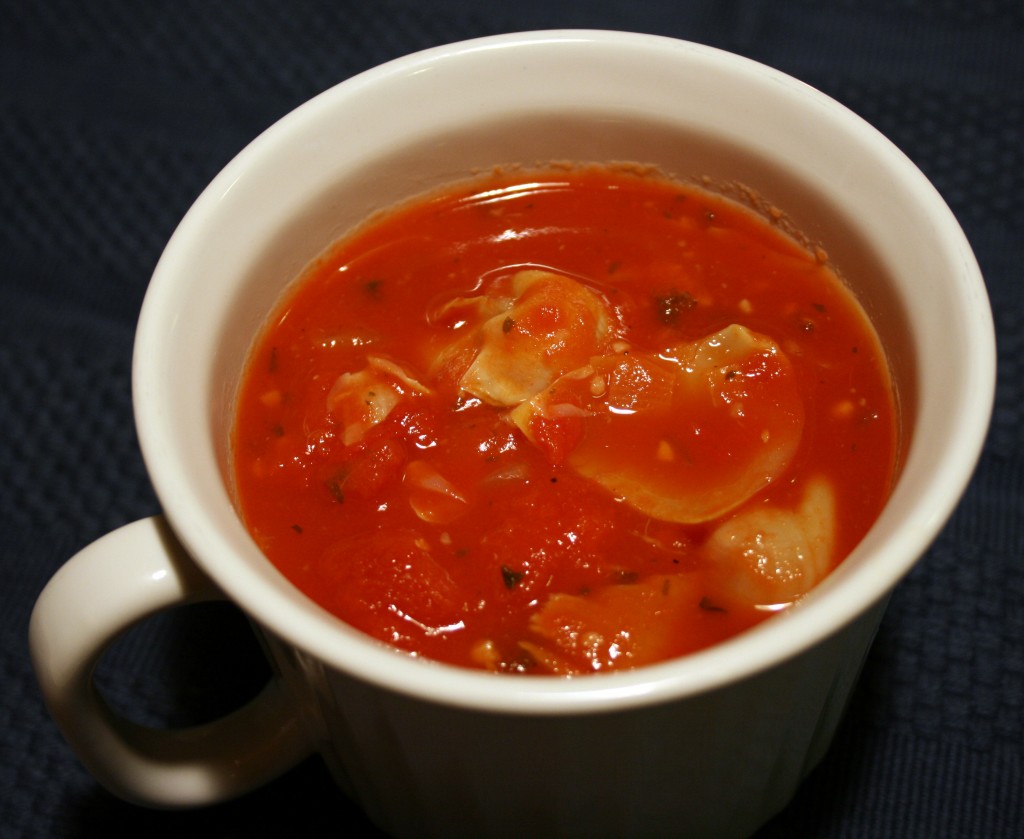
What do you make for a last minute dinner party when you are two days away from moving? Not that this would ever happen to me, but if it did I would open my pantry wide and see what I could find that needs to be used. Oooh! Canned tomatoes! And there is a can of artichoke hearts! There is still some garlic cloves left over? Where did those come from? Chicken broth! Yay! Served along with grilled cheese and egg salad sandwiches we had a wonderful spring dinner with very few leftovers. I did not use cream this time to smooth out the soup’s texture, but if you add ½ to ¾ cup during the last half of the cooking process the soup can only get better. Enjoy! I have to get back to sorting toys before Little B returns home. I found it is a really bad task to try and accomplish with her ‘help’.

Tomato Artichoke Soup

2 14.5-ounce cans diced tomatoes
1 29-ounce can tomato sauce
1 14.5 ounce can whole medium artichoke hearts
1 cup chicken broth
½ medium onion, diced
1 Tbsp finely chopped basil
2 cloves garlic
1 pinch red pepper flakes
1 tsp sugar
1 Tbsp Worcestershire sauce
Salt and Pepper to taste

Combine all ingredients except salt into a medium pot over medium high heat. Bring to a boil. Lower temperature and cover, simmering for about an hour. Break up artichoke hearts (I scooped them out one by one with a ladle and gently pushed on them with a soup spoon – they easily separated). Adjust flavor with salt as desired. Serve immediately or chill and reheat on low before serving.

Post Navigation